Owallet Desktop Wallet User Guide
Using Owallet Dekstop Wallet is the simplest way to start using Ontology Basic functions. It is available for Linux, Mac and Windows platforms (see Supported Platforms for details).
Downloading binaries
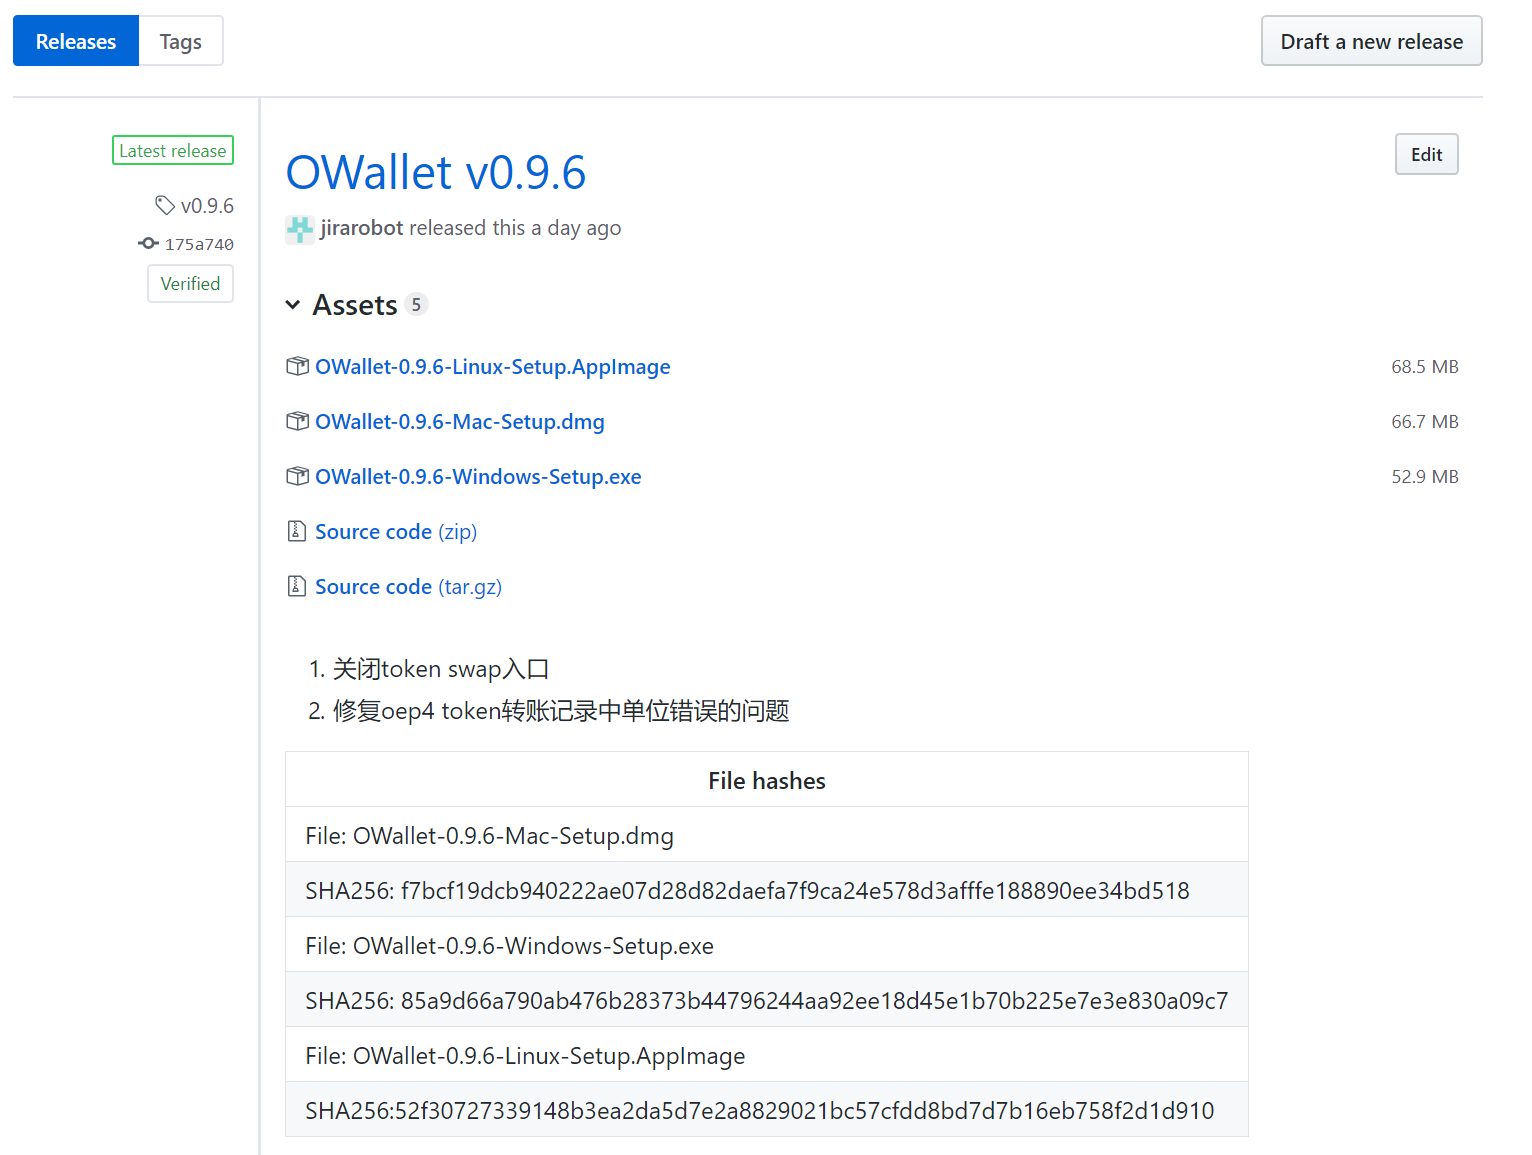
Start dowloading here: https://github.com/ontio/OWallet/releases
Download the Owallet client for your platform (Mac, Linux or Windows):
Note
Ensure that you’ve downloaded the untampered Wallet installation file by checking that the value generated by SHA256 is the same as announced on the github link:
- On Mac open terminal and run:
shasum -a 256 <file> - On Linux run:
sha256sum <file> - On Windows, open Power Shell and run:
Get-FileHash 'C:\Users\<your_user_name>\Downloads\beam-node-1.0.3860.zip
Substitute your preferred path instead of the one in the example above.
Note
As the wallet will be continuously updated, the actual version numbers and SHA values might be different from the screenshot at the moment of reading.
Installing the Owallet client on Windows
Once the application image is downloaded, double-click the icon to start the installation.
When you click on the .exe file you will see a screen with Windows Installer . Please substitute your preferred install path and click ‘Install’.

Now, launch the OWallet from the installer. When notification appears, click ‘Finish’.

Attention
When you will try to open the Owallet for the first time, you will receive a security warning stating that OWallet was created by an unrecognized developer. We are working to elimitate the warning, meanwhile ignore the warning.


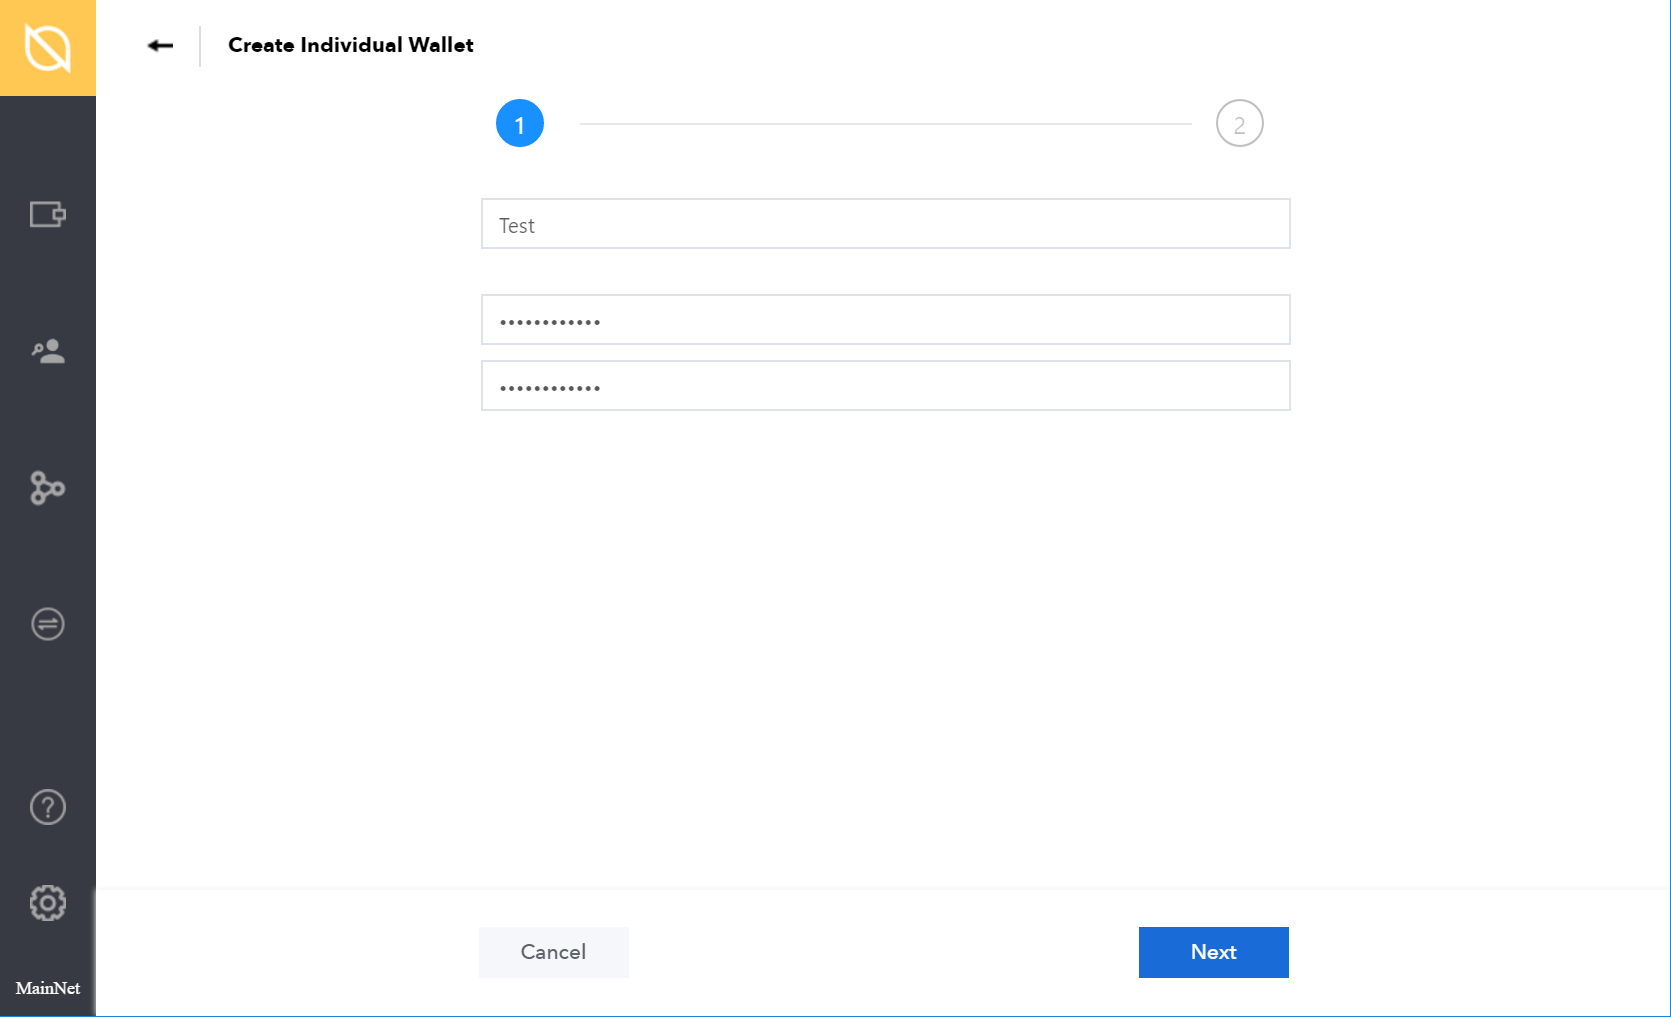
Setting wallet password
To access your OWallet, you will need to create a password. Your wallet password provides with a second security layer in case someone gains access to your computer or has stolen your wallet database file. It is important to choose a strong password.
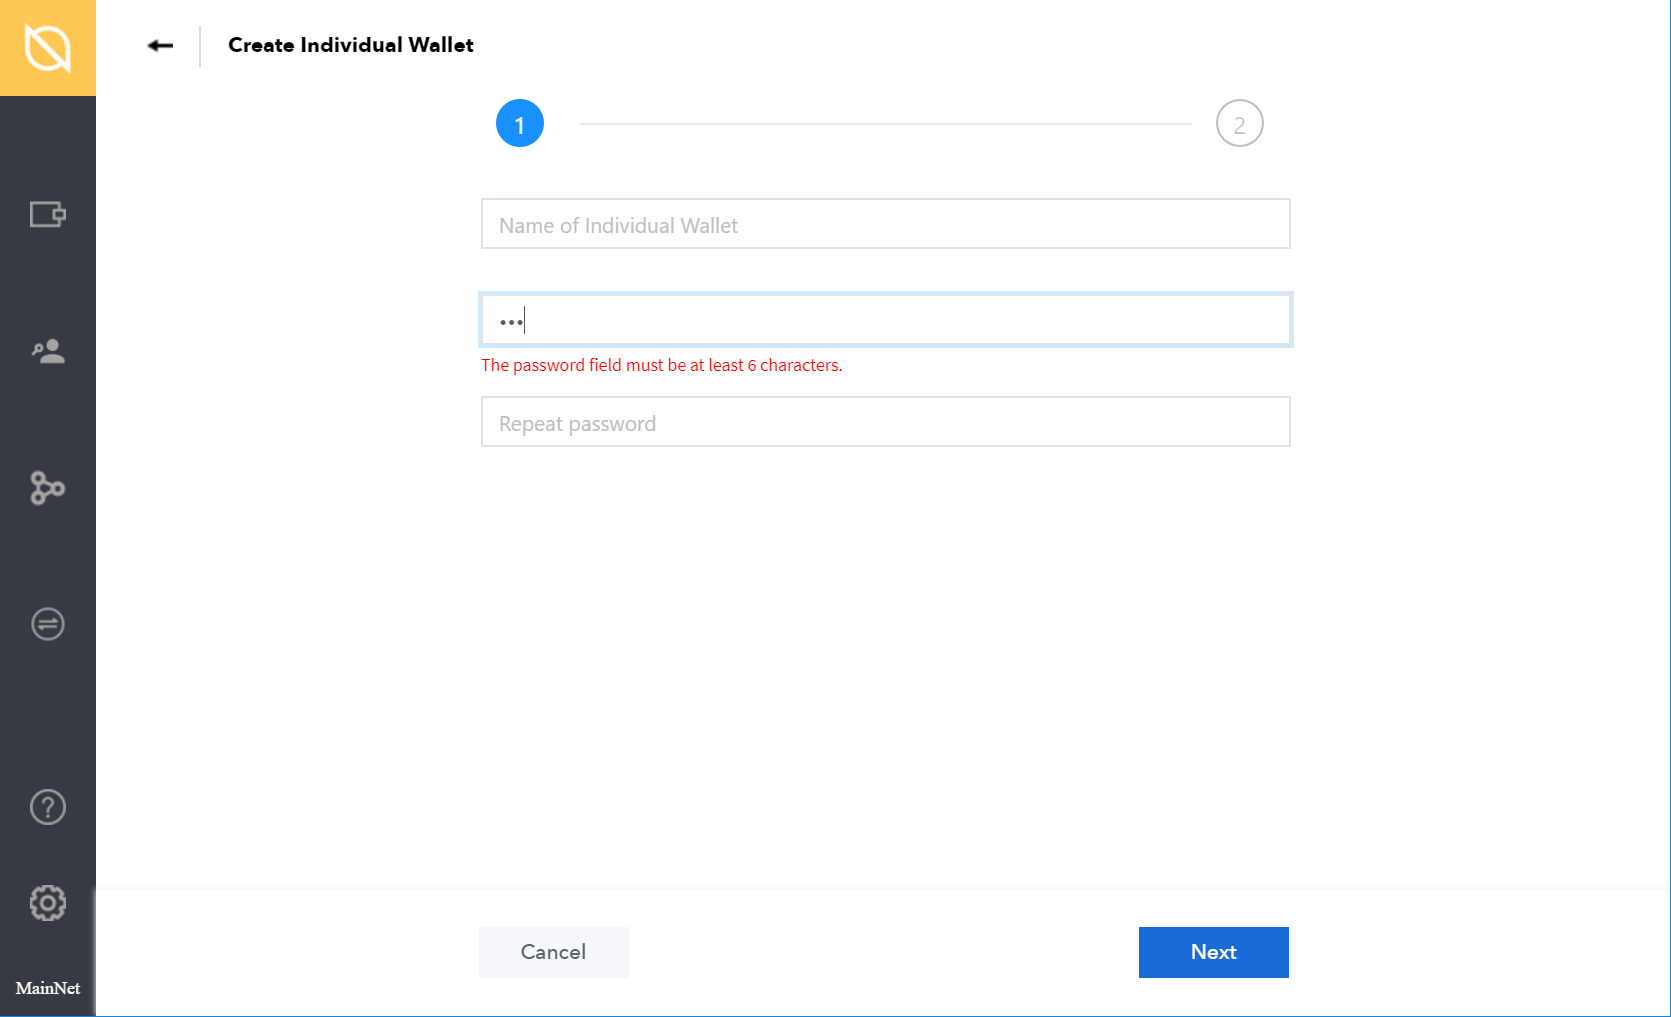
The wallet will provide some indication of password strength for your convenience. Do not count on it, however. Choose a password that is at least 6 characters long with combination of letters, numbers, and symbols.
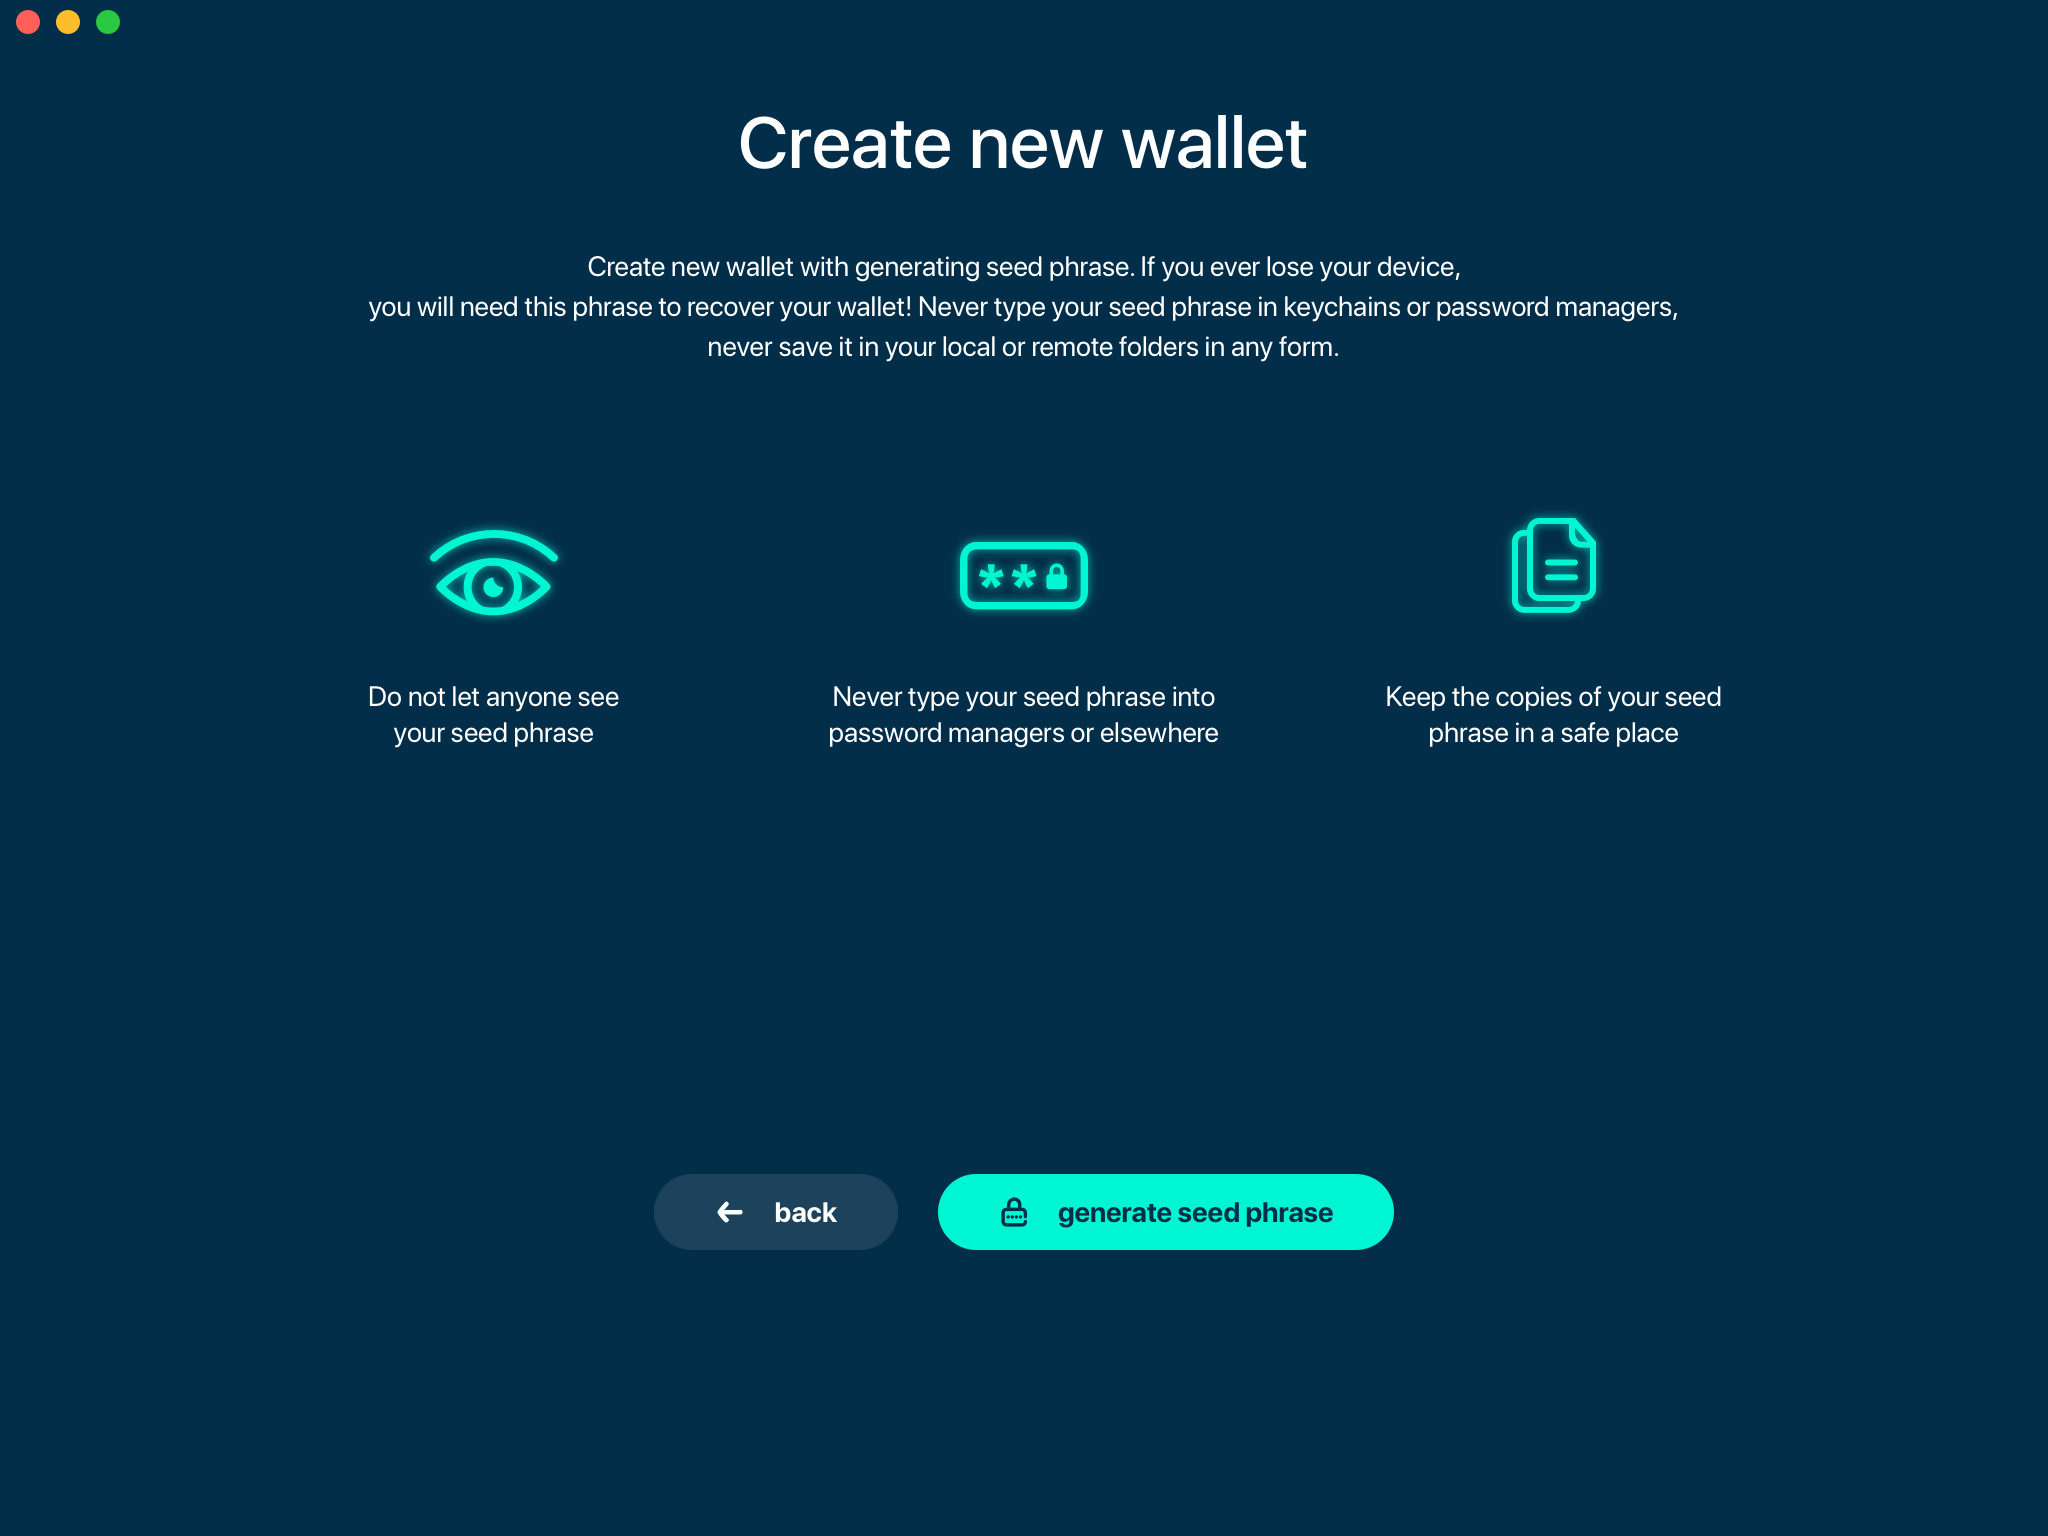
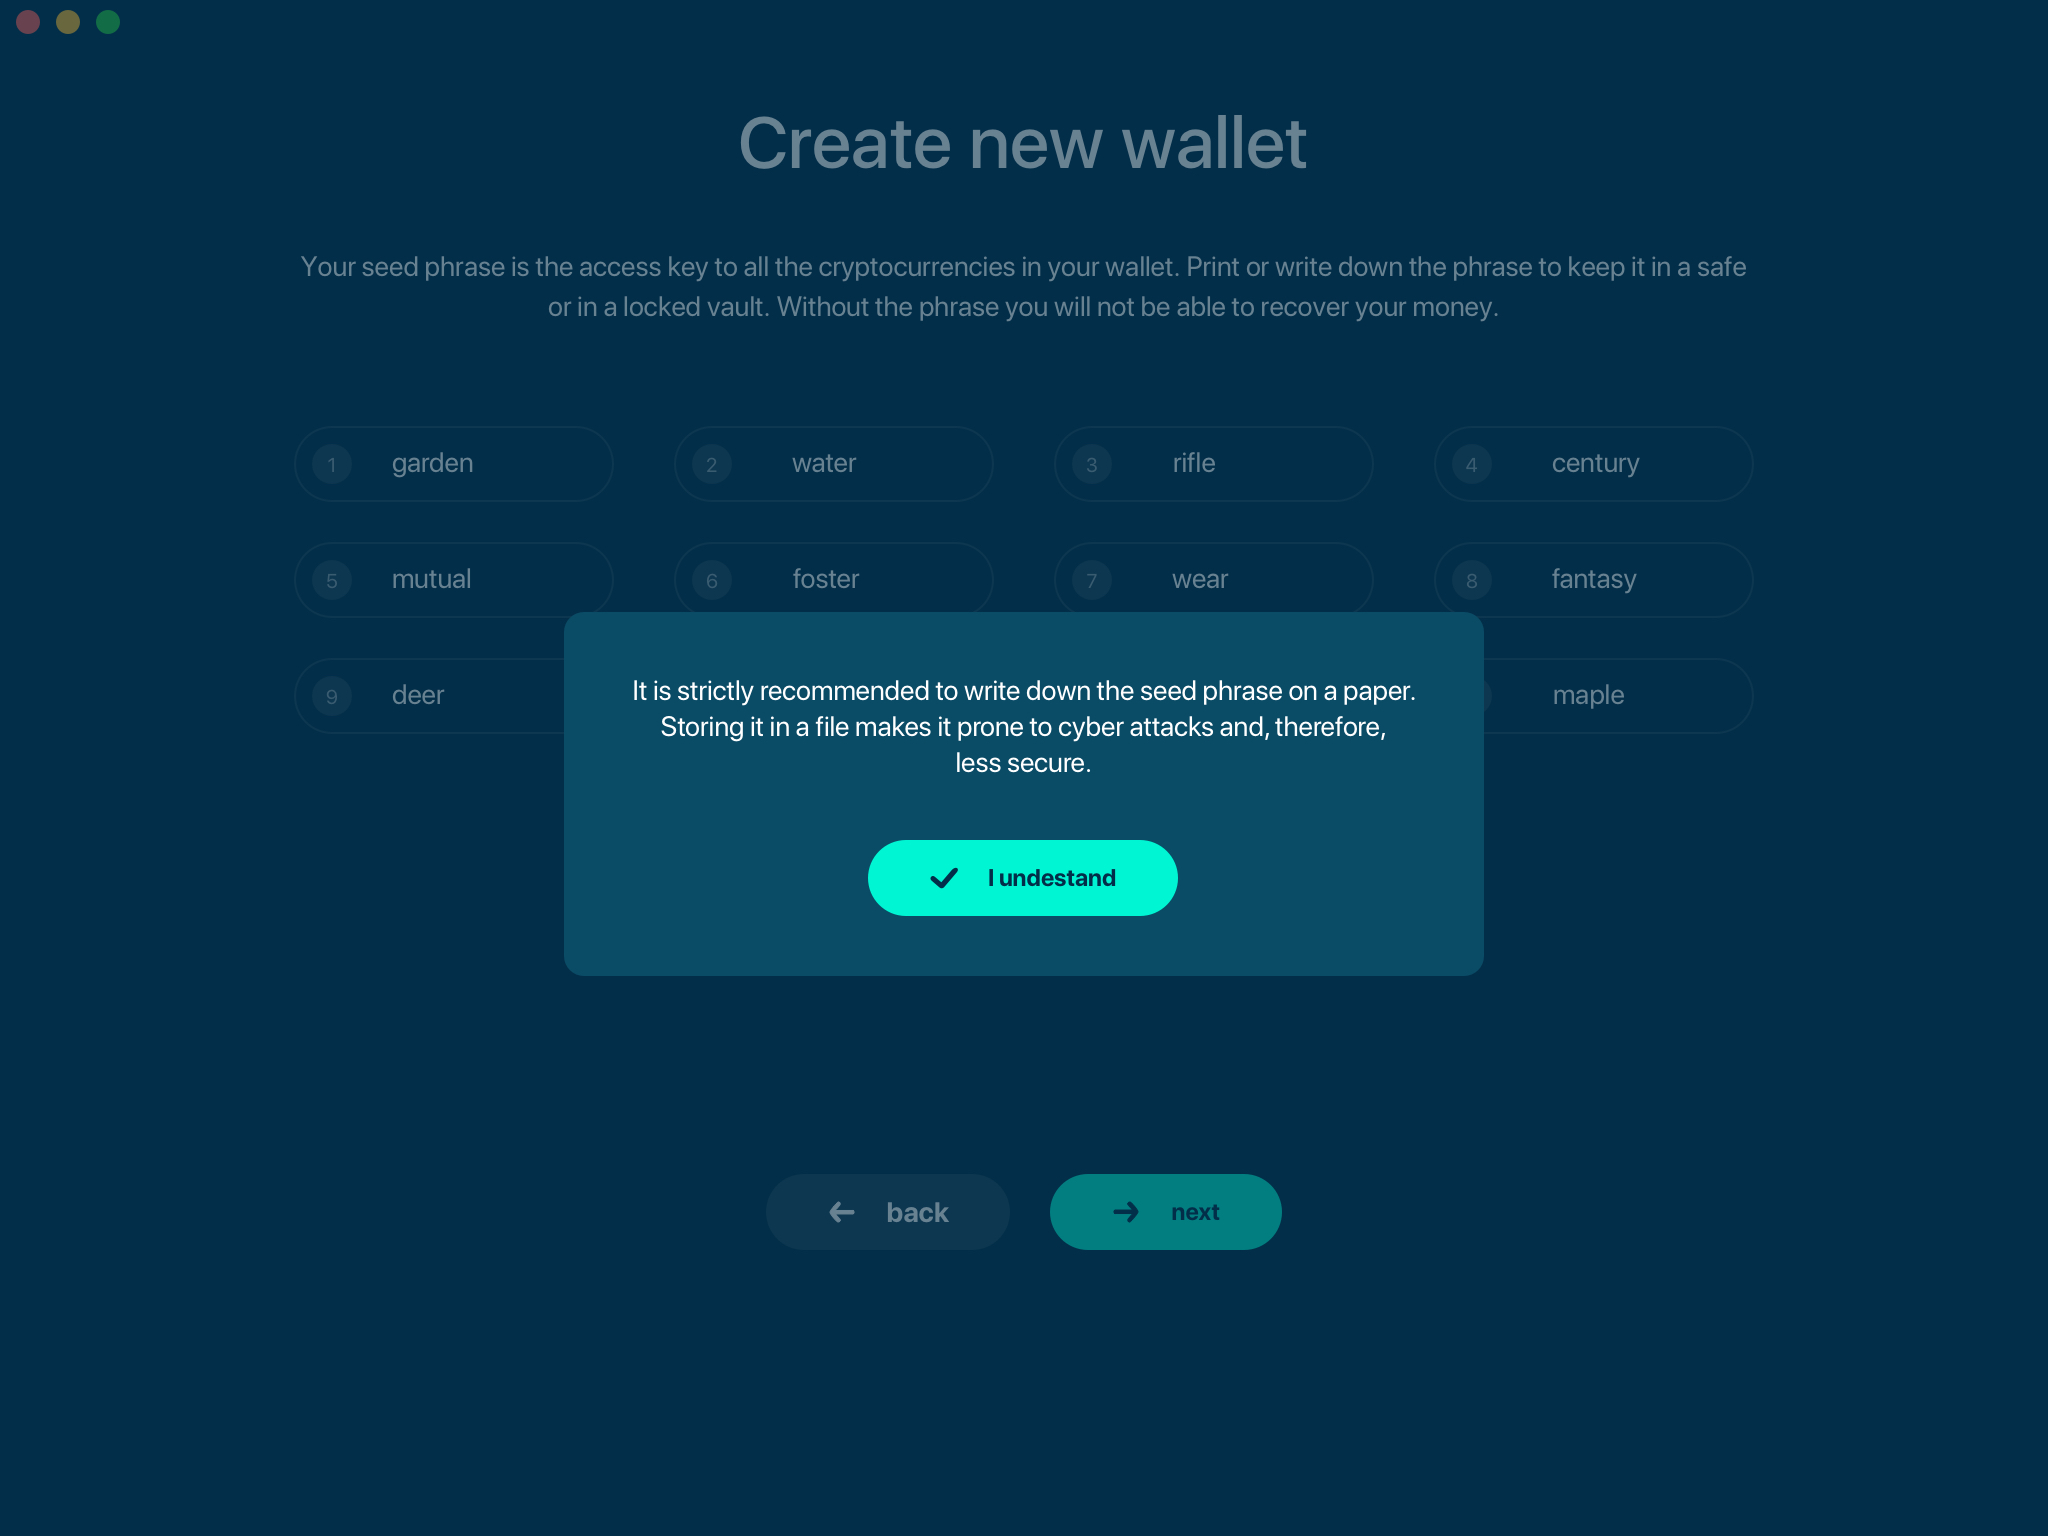
Generating seed phrase
As a part of creating a new wallet, a new seed phrase will be generated for you.
Attention
Seed phrase is the most important secret you have to keep. Knowing the seed phrase enables you (or anyone else) to access all your funds.
Attention
Seed phrase in the Beam wallet is not linked to email, phone number or any other identifier. You will need this phrase to restore your wallet when you lose or reformat your device, or want to access your funds from another device (your mobile phone or another desktop / laptop).

Attention
The seed phrase is for your eyes only! Make sure no one is looking over your shoulder. For the best security always do it on a clean air-gapped machine.
Did you wrote down your seed phrase correctly? Triple-check your handwriting again. The difference between _F_unnel and _T_unnel can be crucial when trying to restore a wallet with valuable funds in the far or near future.
Did you verified your handwriting? Now go find a safe space for the paper!
Important
Storing the seed phrase on your computer makes your funds prone to cyber attacks (read: much less secure). ‘Creative’ approaches like saving a screenshot of the wallet or your handwriting on your computer or in the cloud may sound like a good idea, but it is absolutely not recommended. If hackers get the access to your computer, network drive etc., they can can potentially steal your recovery phrase by using OCR programs (which can scan pictures and transform them into plain text) and, therefore, get access to your funds.
Attention
Always store your seed phrase in a safe and secure location (and better more than one in different geo locations). Write it on a piece of paper. Do not store electronically neither as plain text nor in any other form!
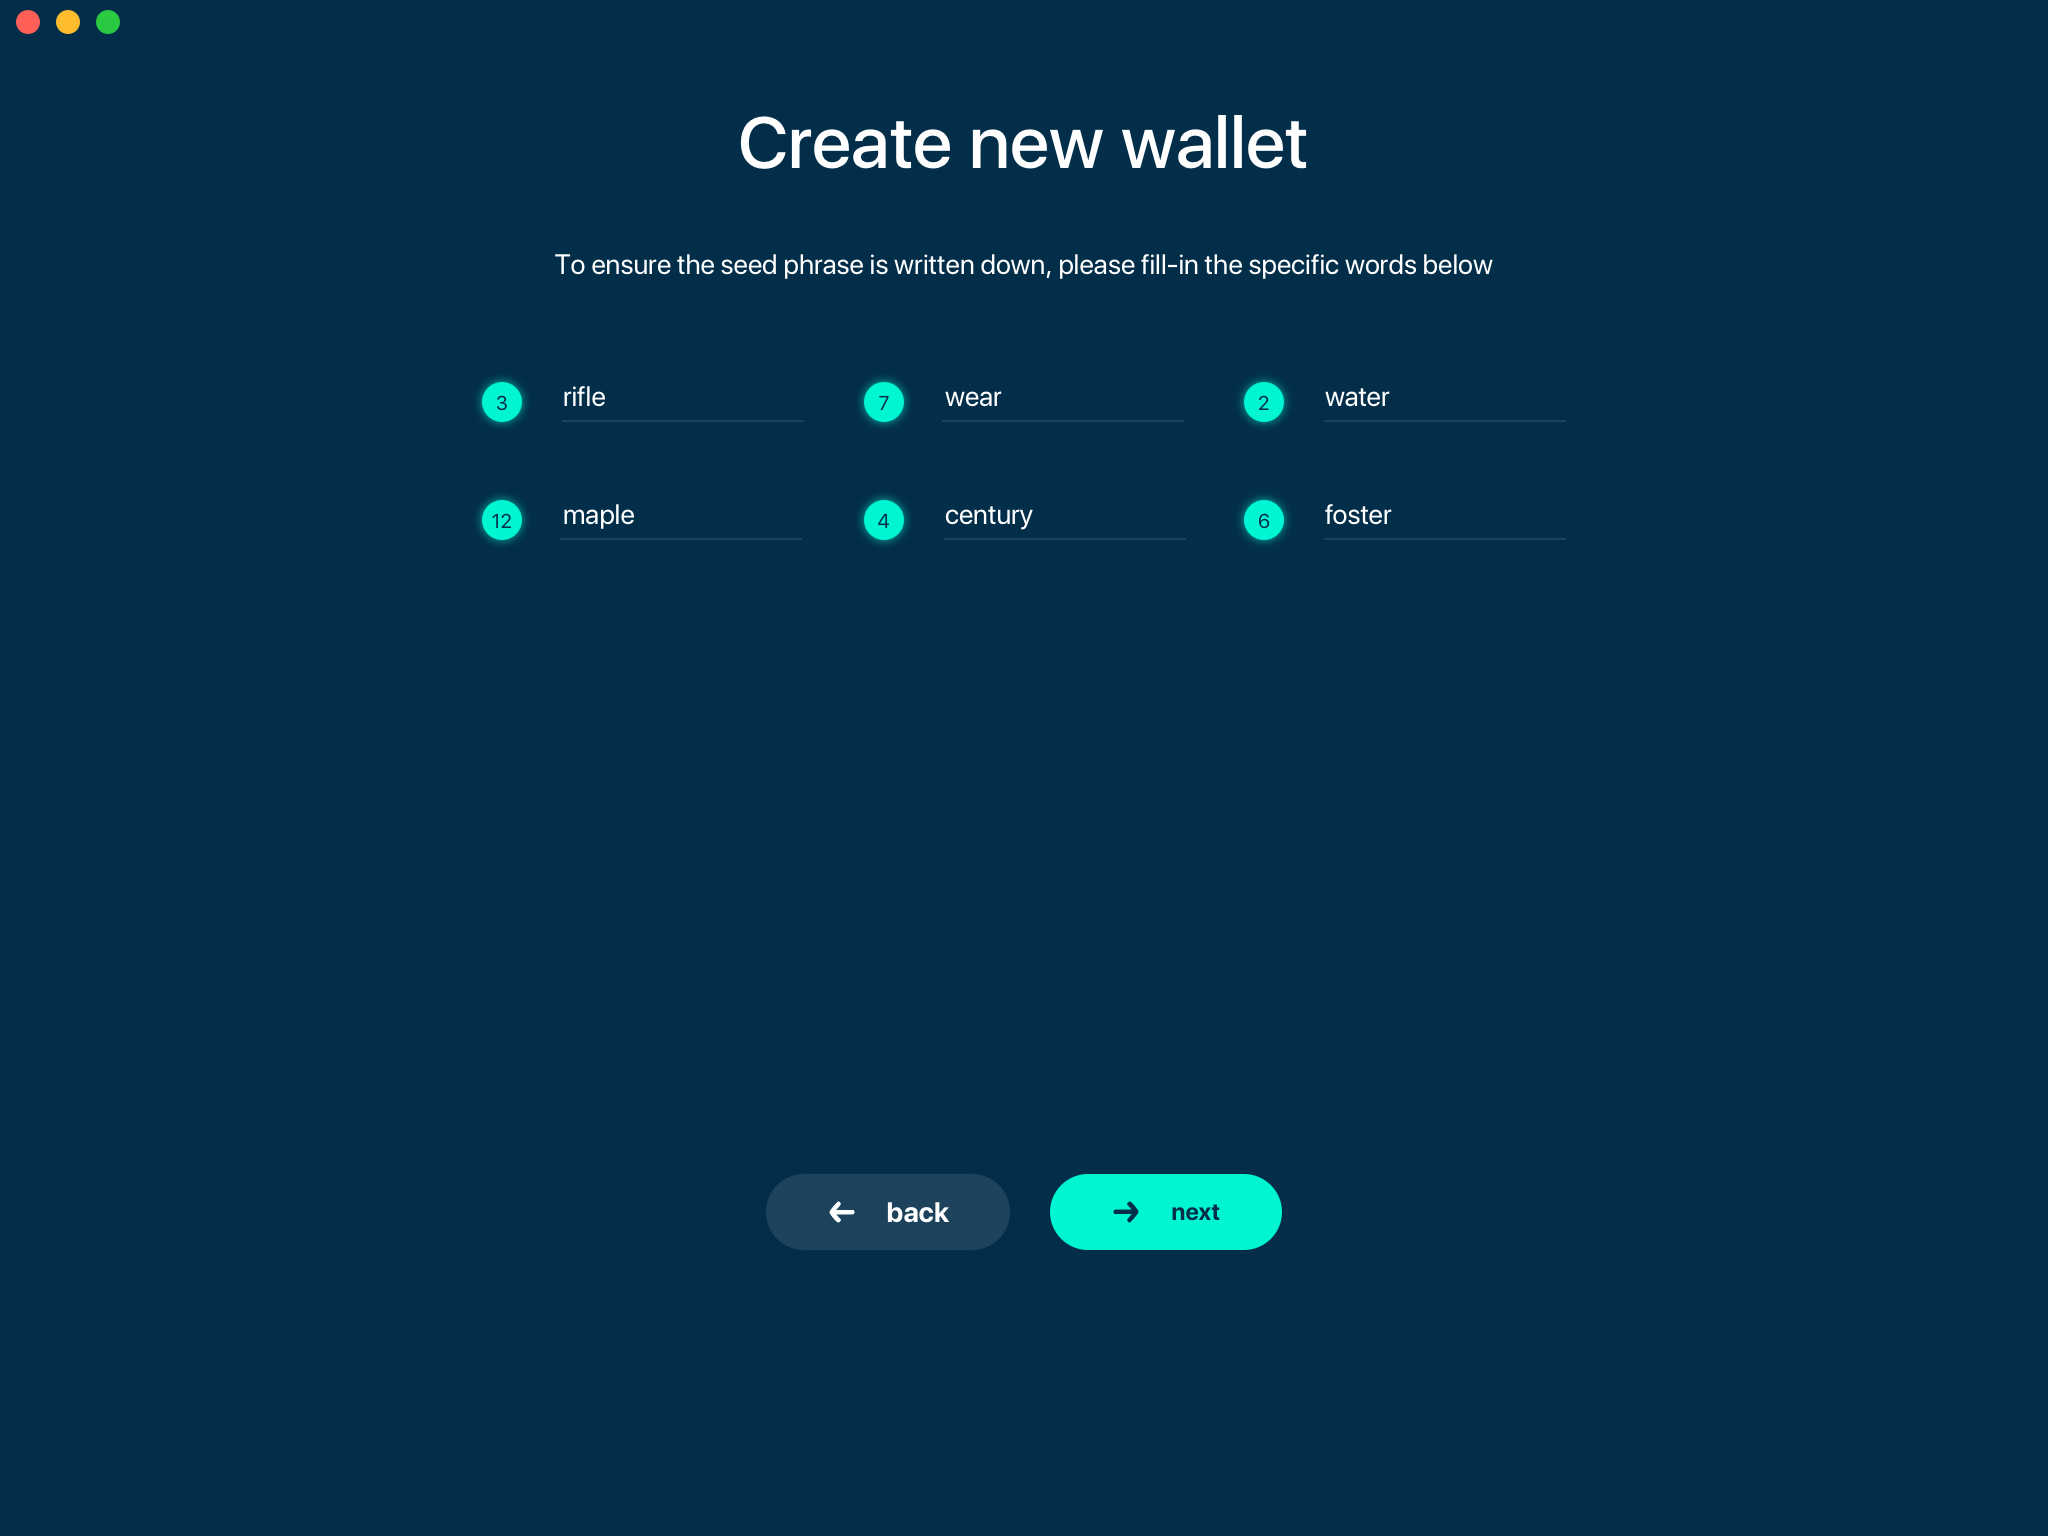
In order to ensure that you have really written down your seed phrase, you will be asked to fill in the specific words from your seed phrase in random order.
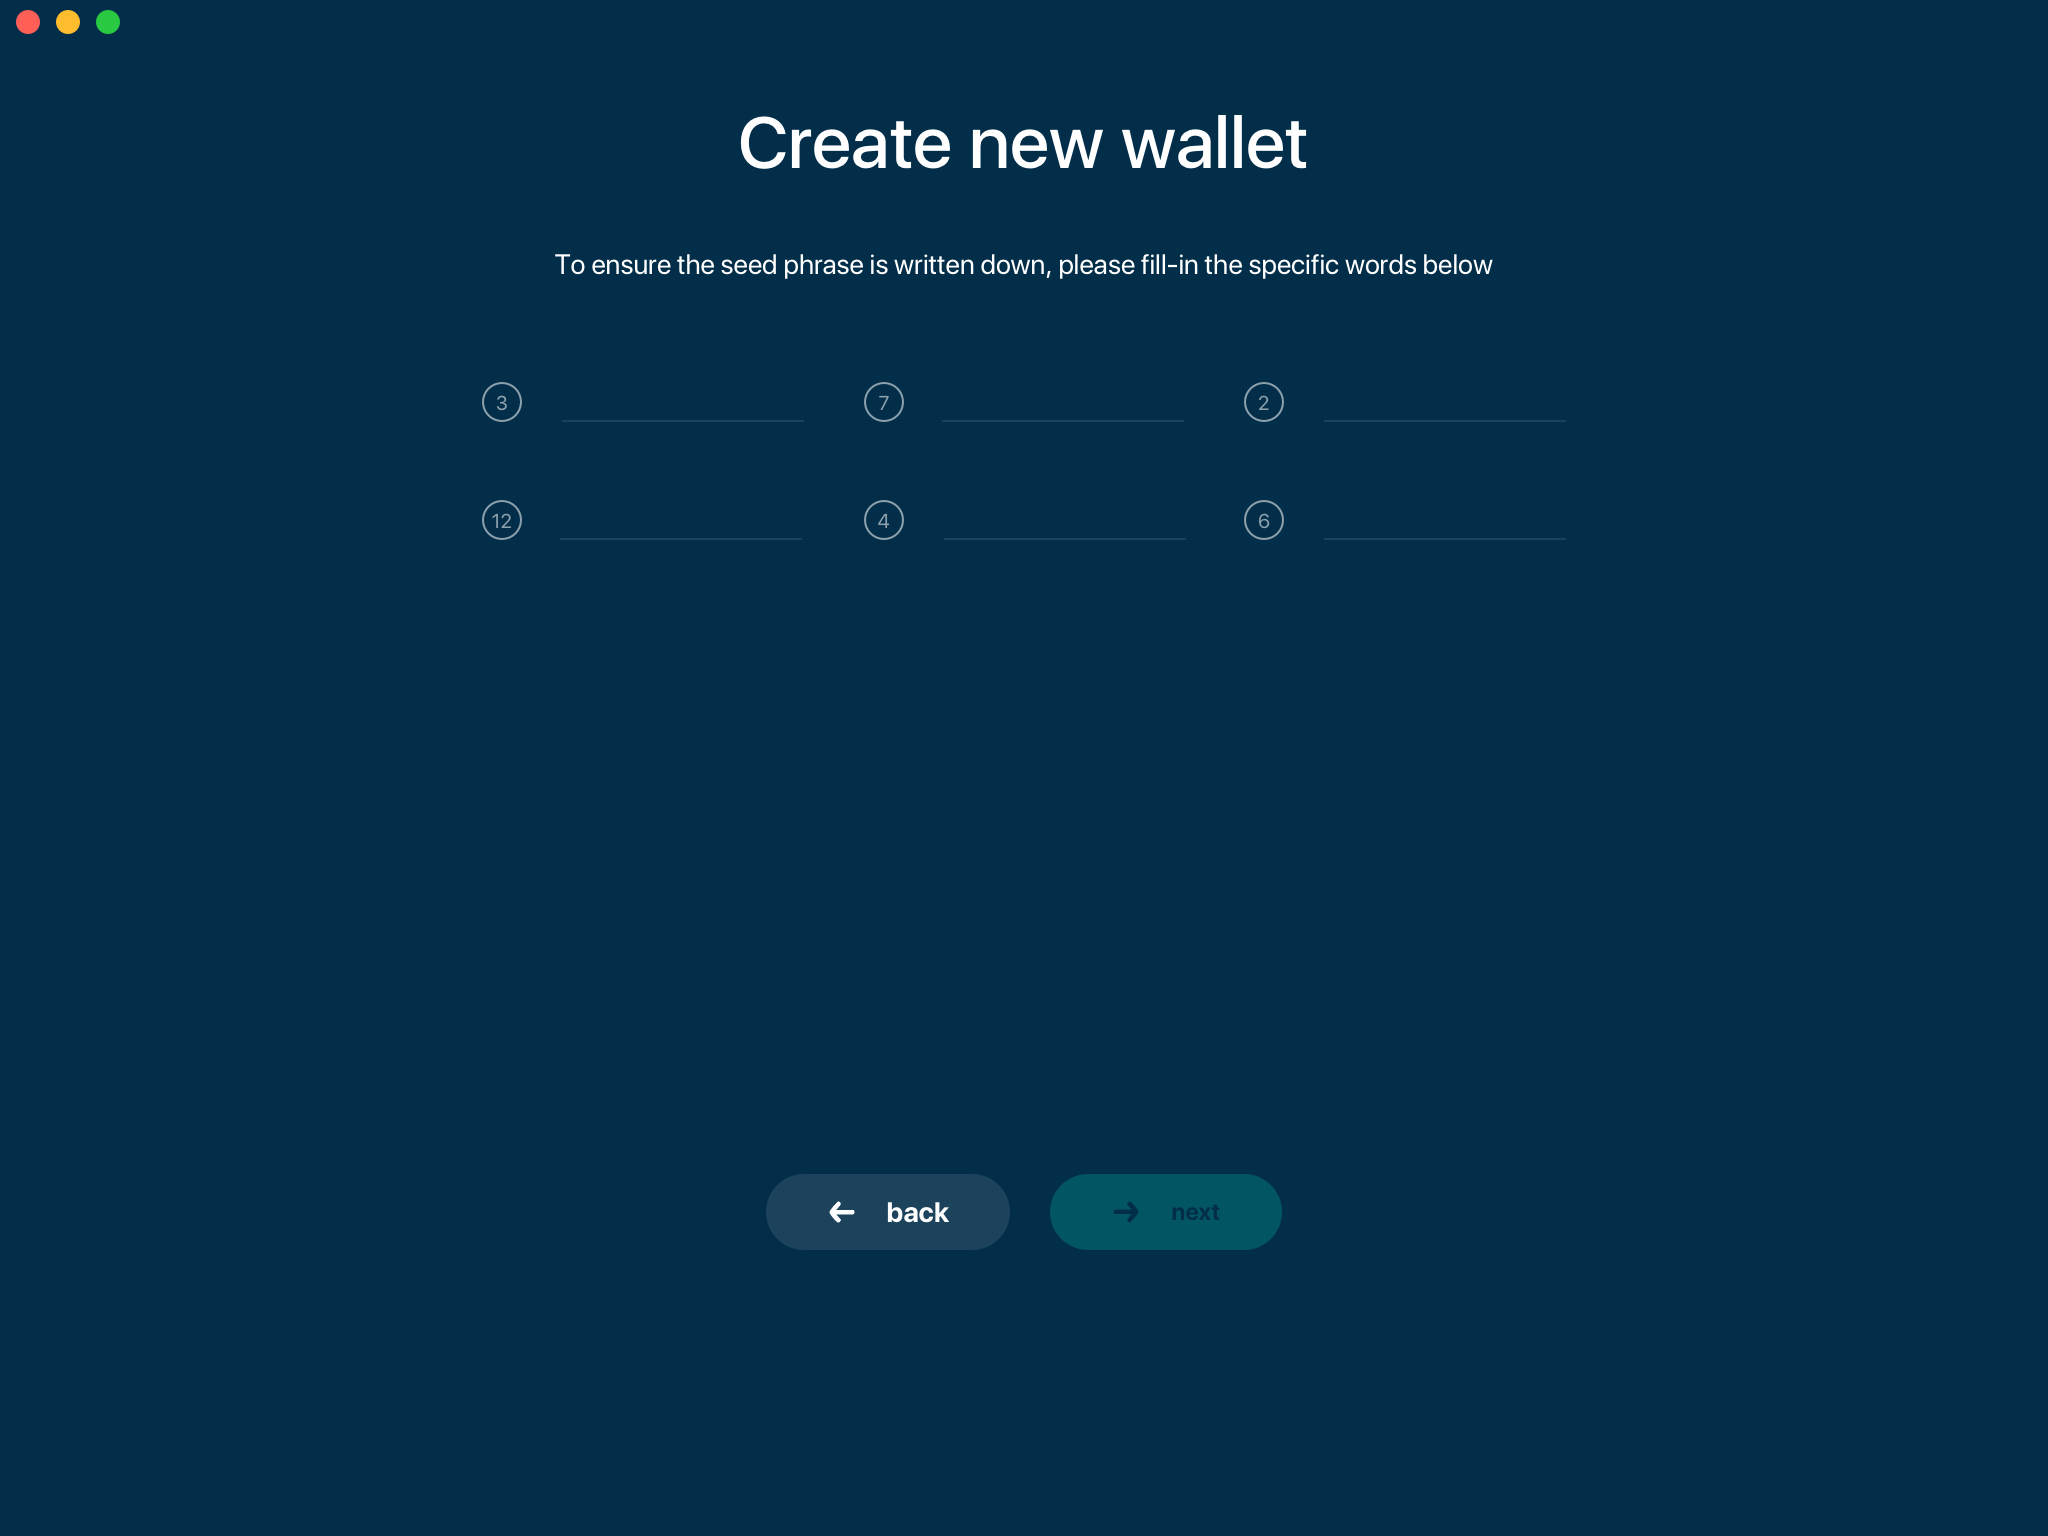
Only when you typed all the selected words correctly, you will be allowed to proceed to the next step.
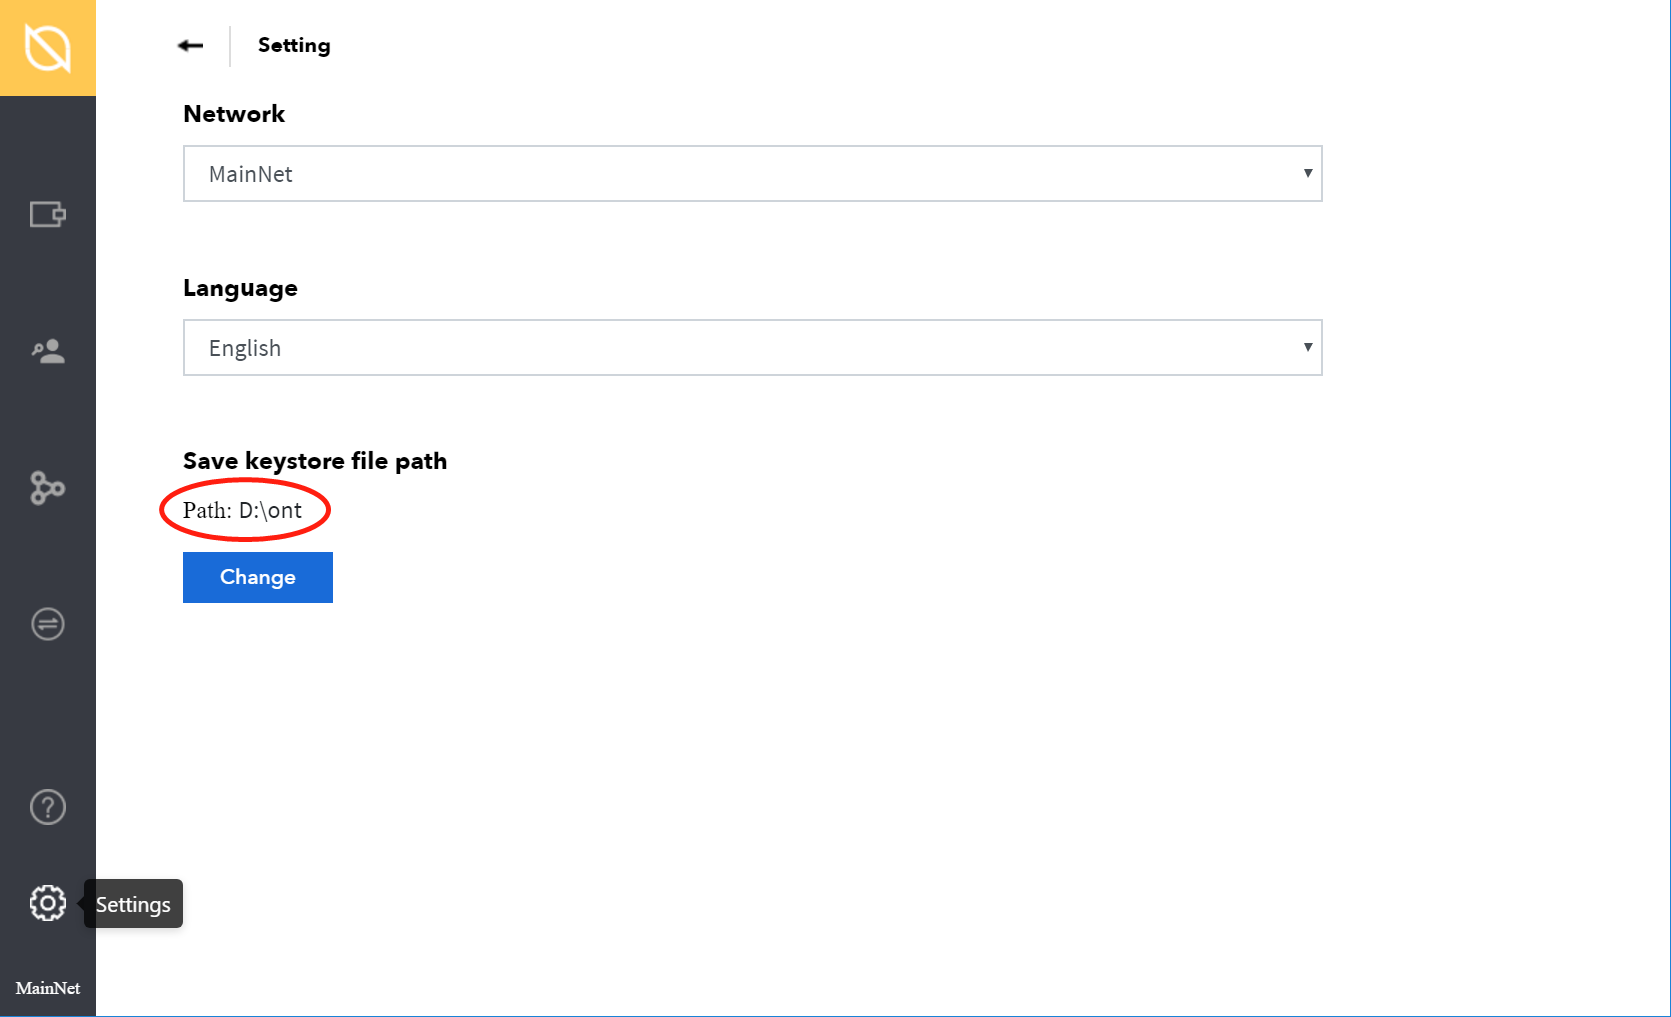
Change keystore file path
The wallet keystore files are stored separately from the wallet data files.
The locations of the keystore files can be set here.
Choosing the network mode
OWallet can connect to the network through:
- MainNet
- TestNet
If you choose to run an integrated node from within the wallet, the trusted node will automatically verify the blockchain. This means you will automatically be connected to a node when you open your wallet.
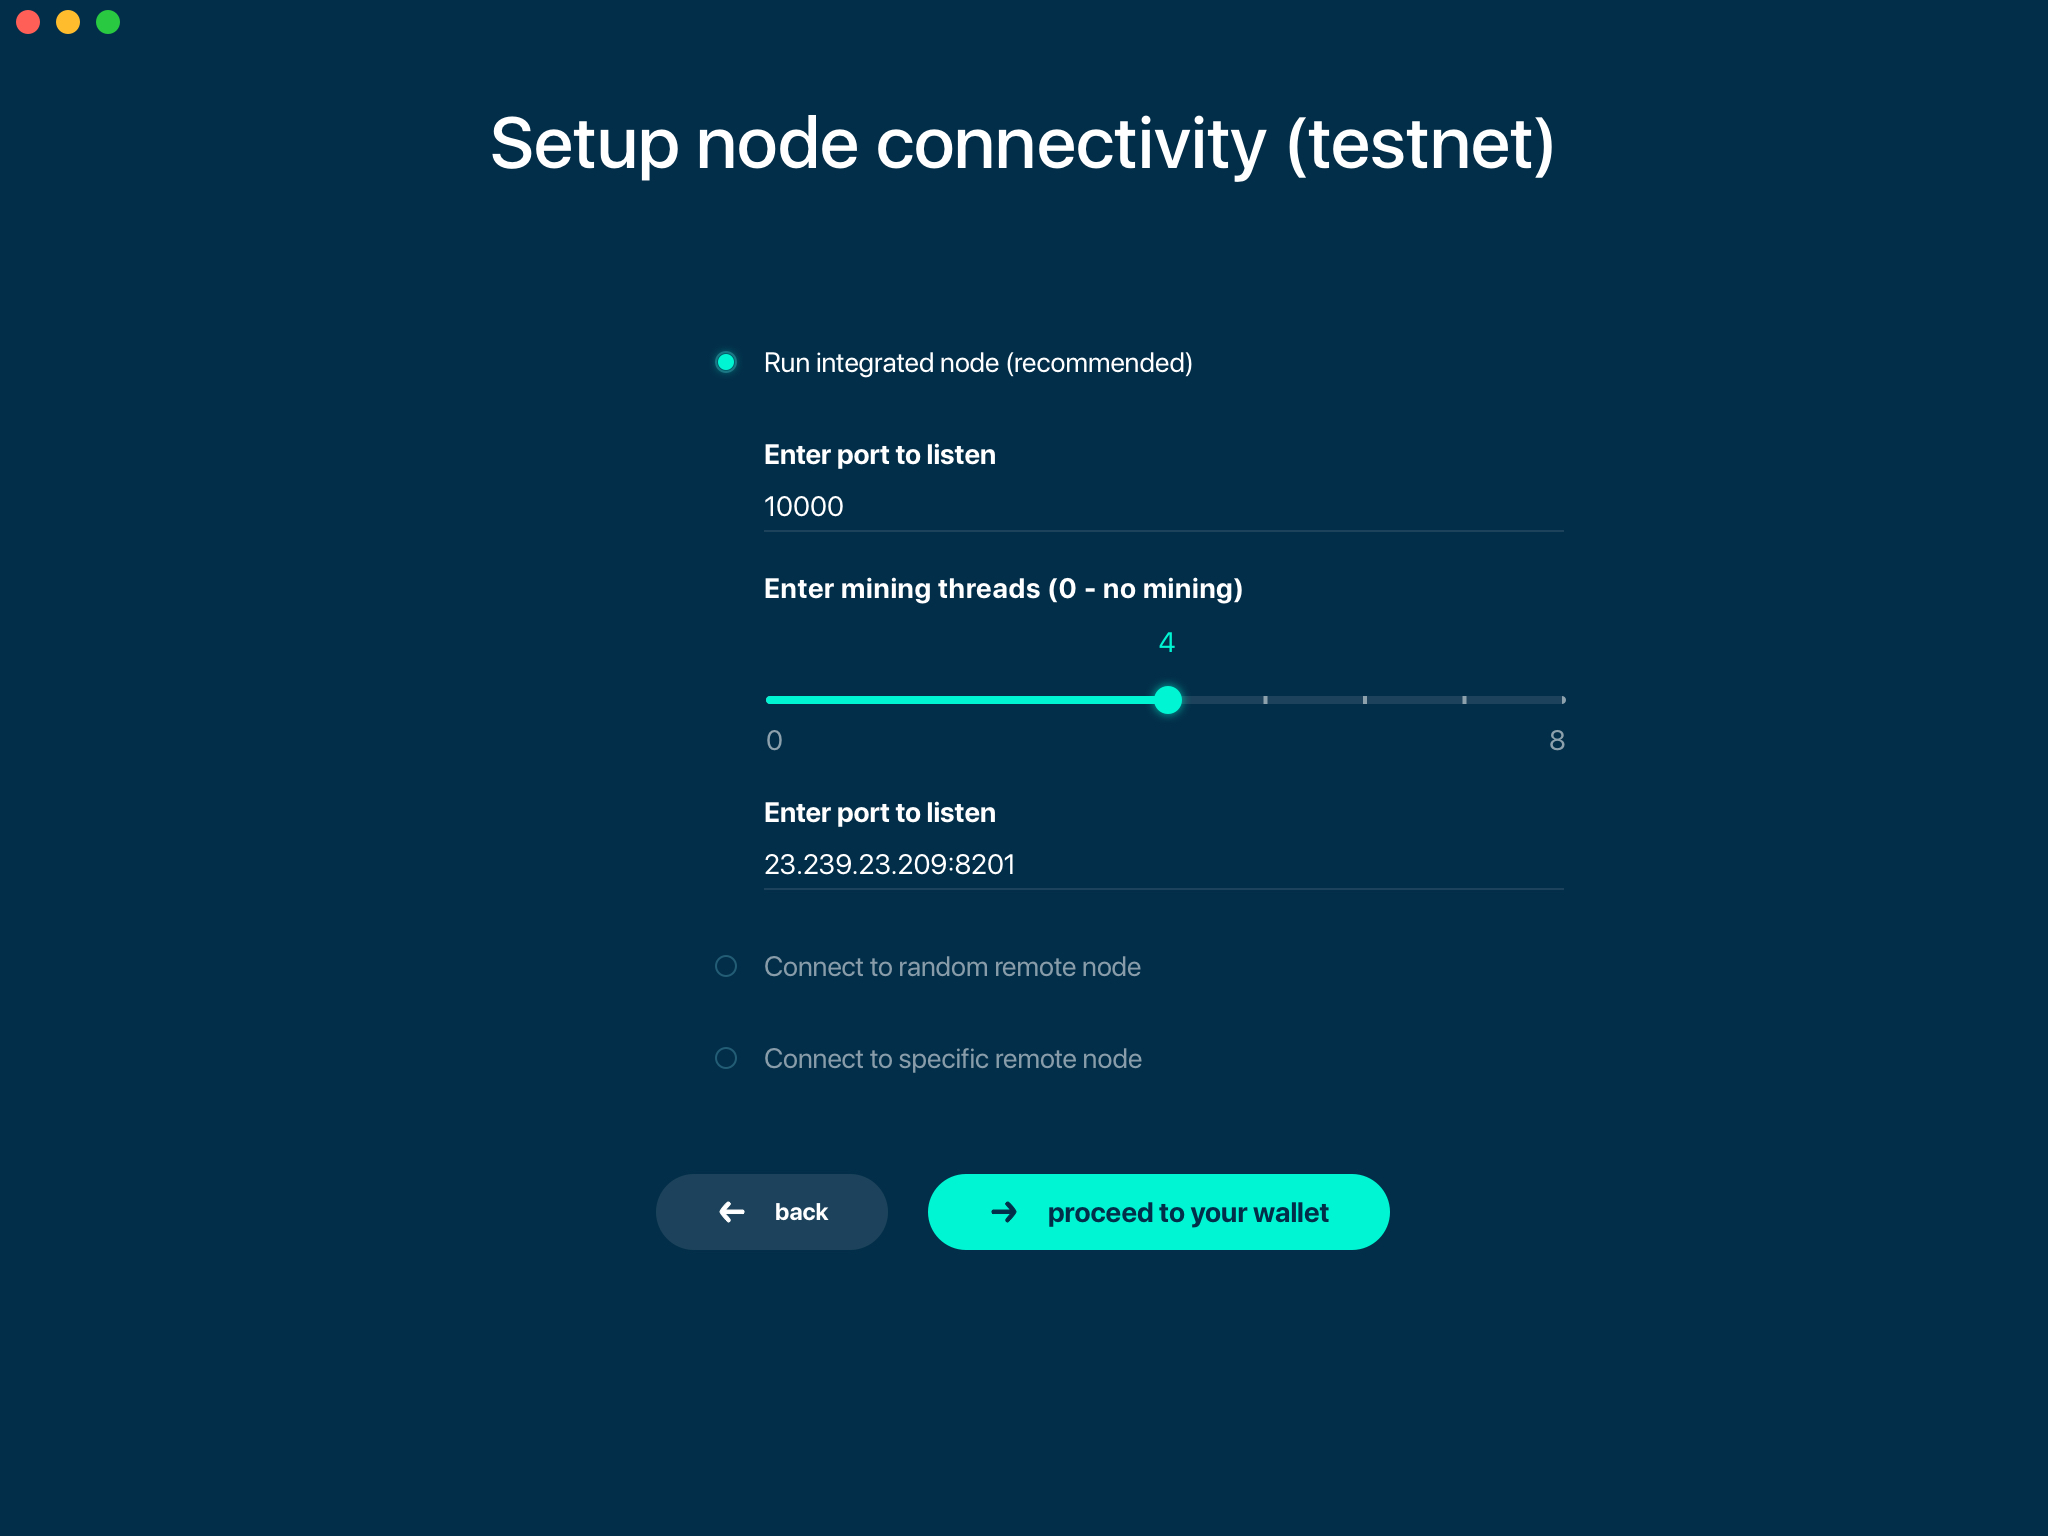
Random mode allows you to automatically connect to random bootstrap node. In this mode Beam Wallet acts like a ‘light client’, it will create transactions but will have to trust the remote node for blockchain verification. It is recommended for lighter devices with limited CPU power and/or RAM memory.
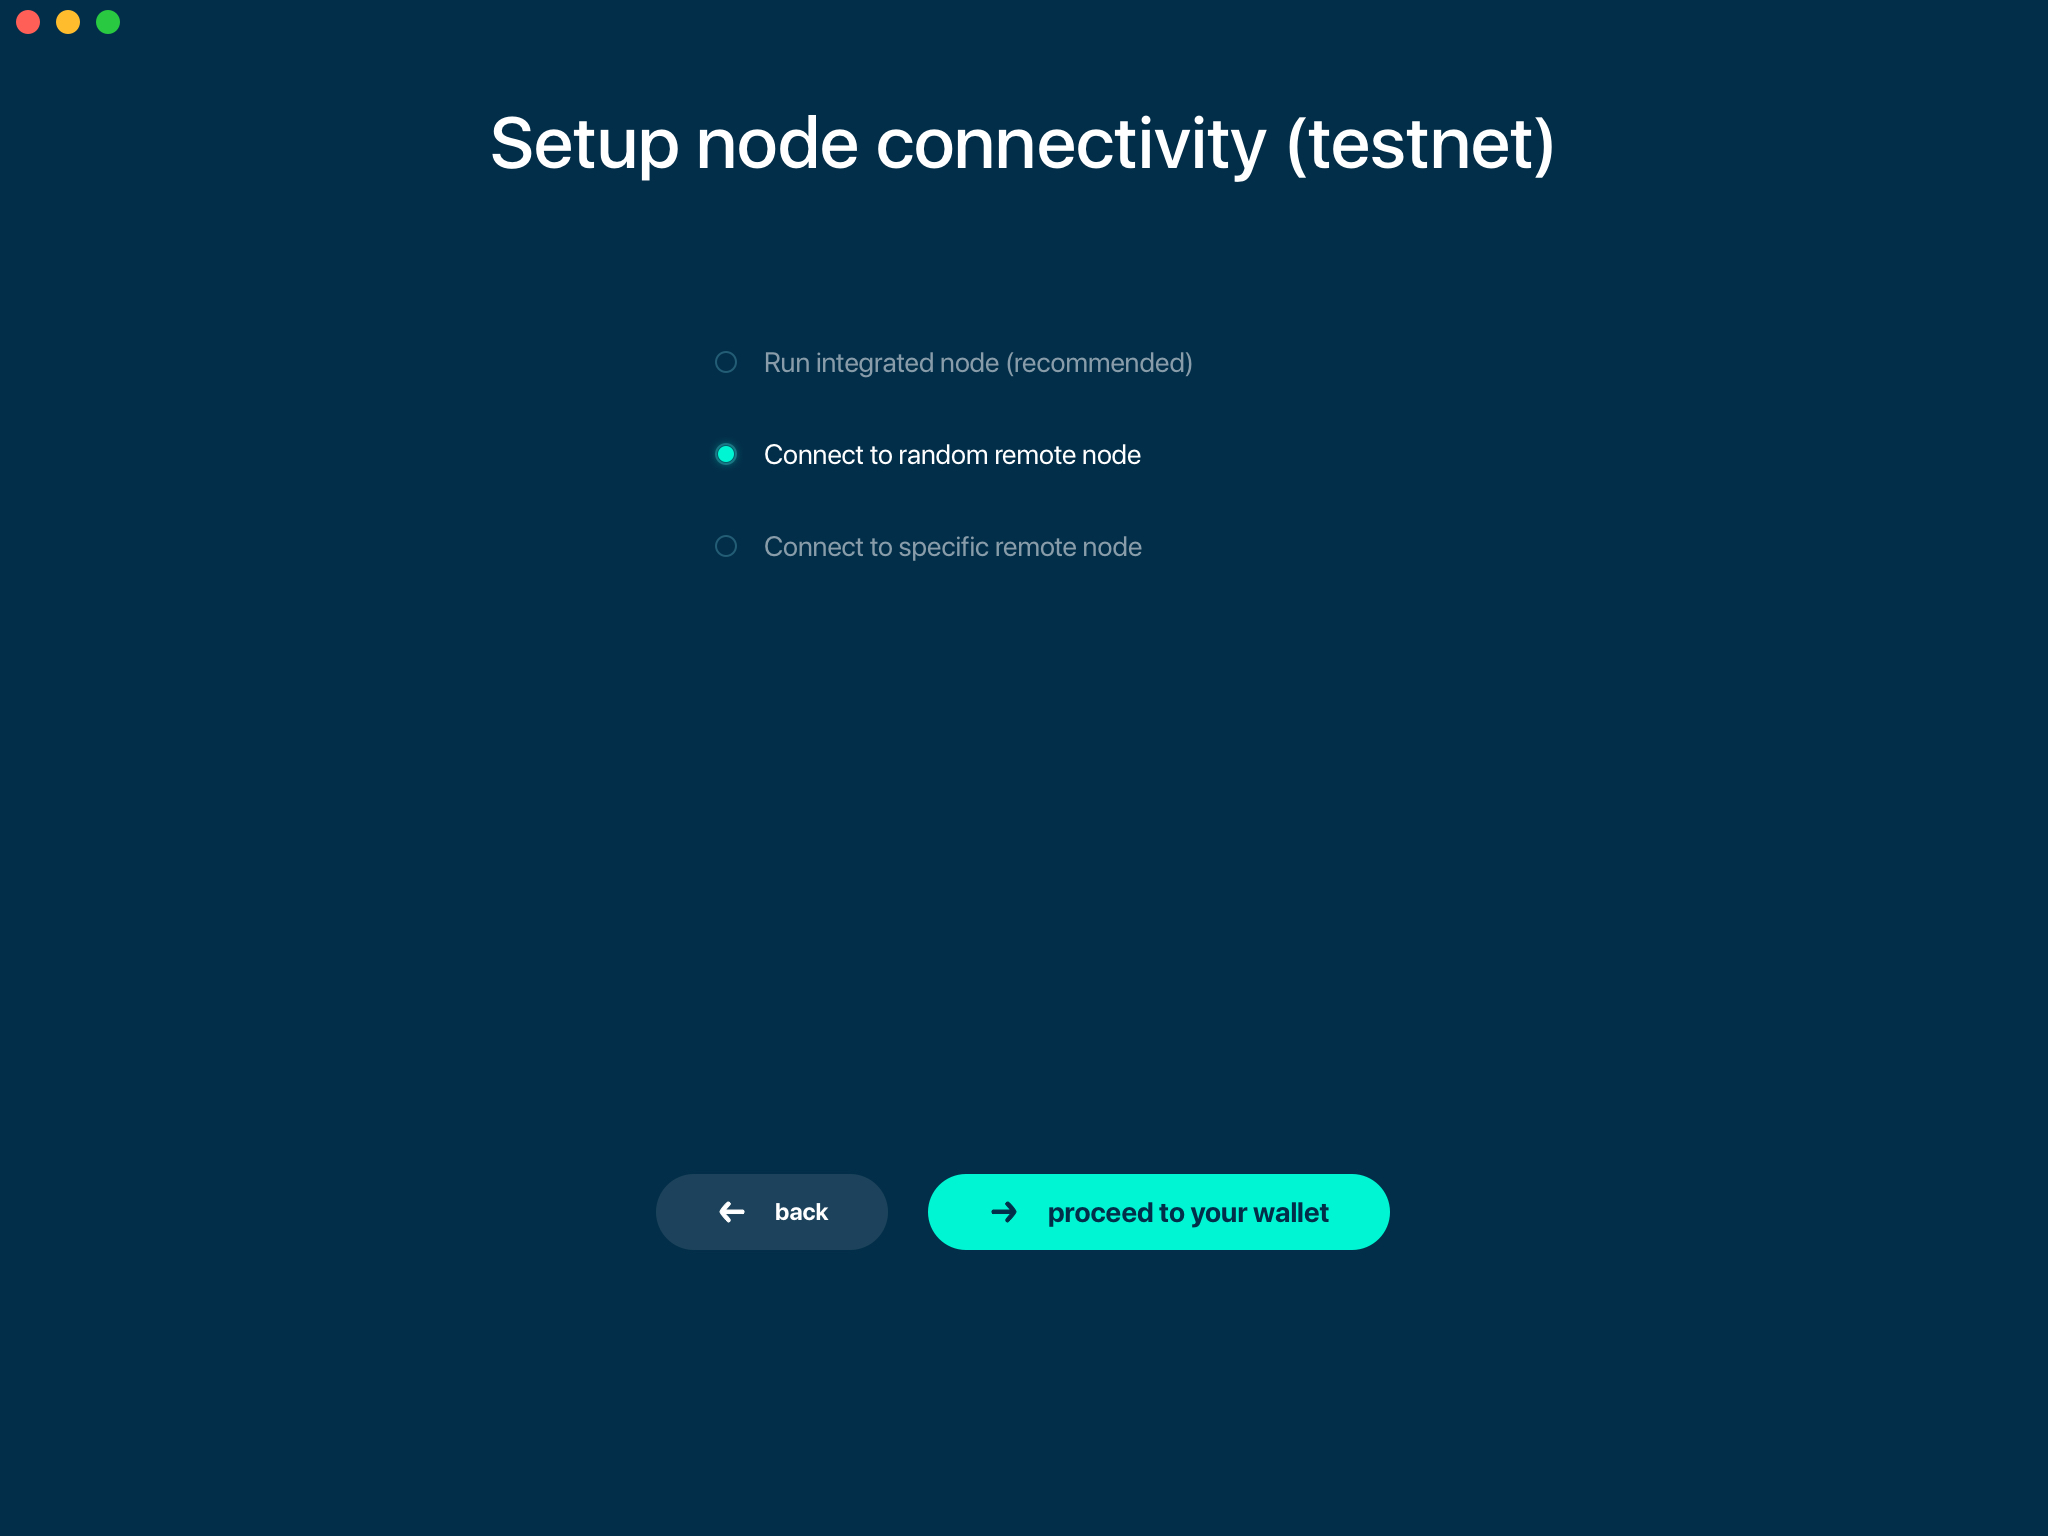
If you are running your own node somewhere (or maybe even more than one) and want to connect specifically to it, use the third option by providing the IP and port the node is listening on.

Main Screen
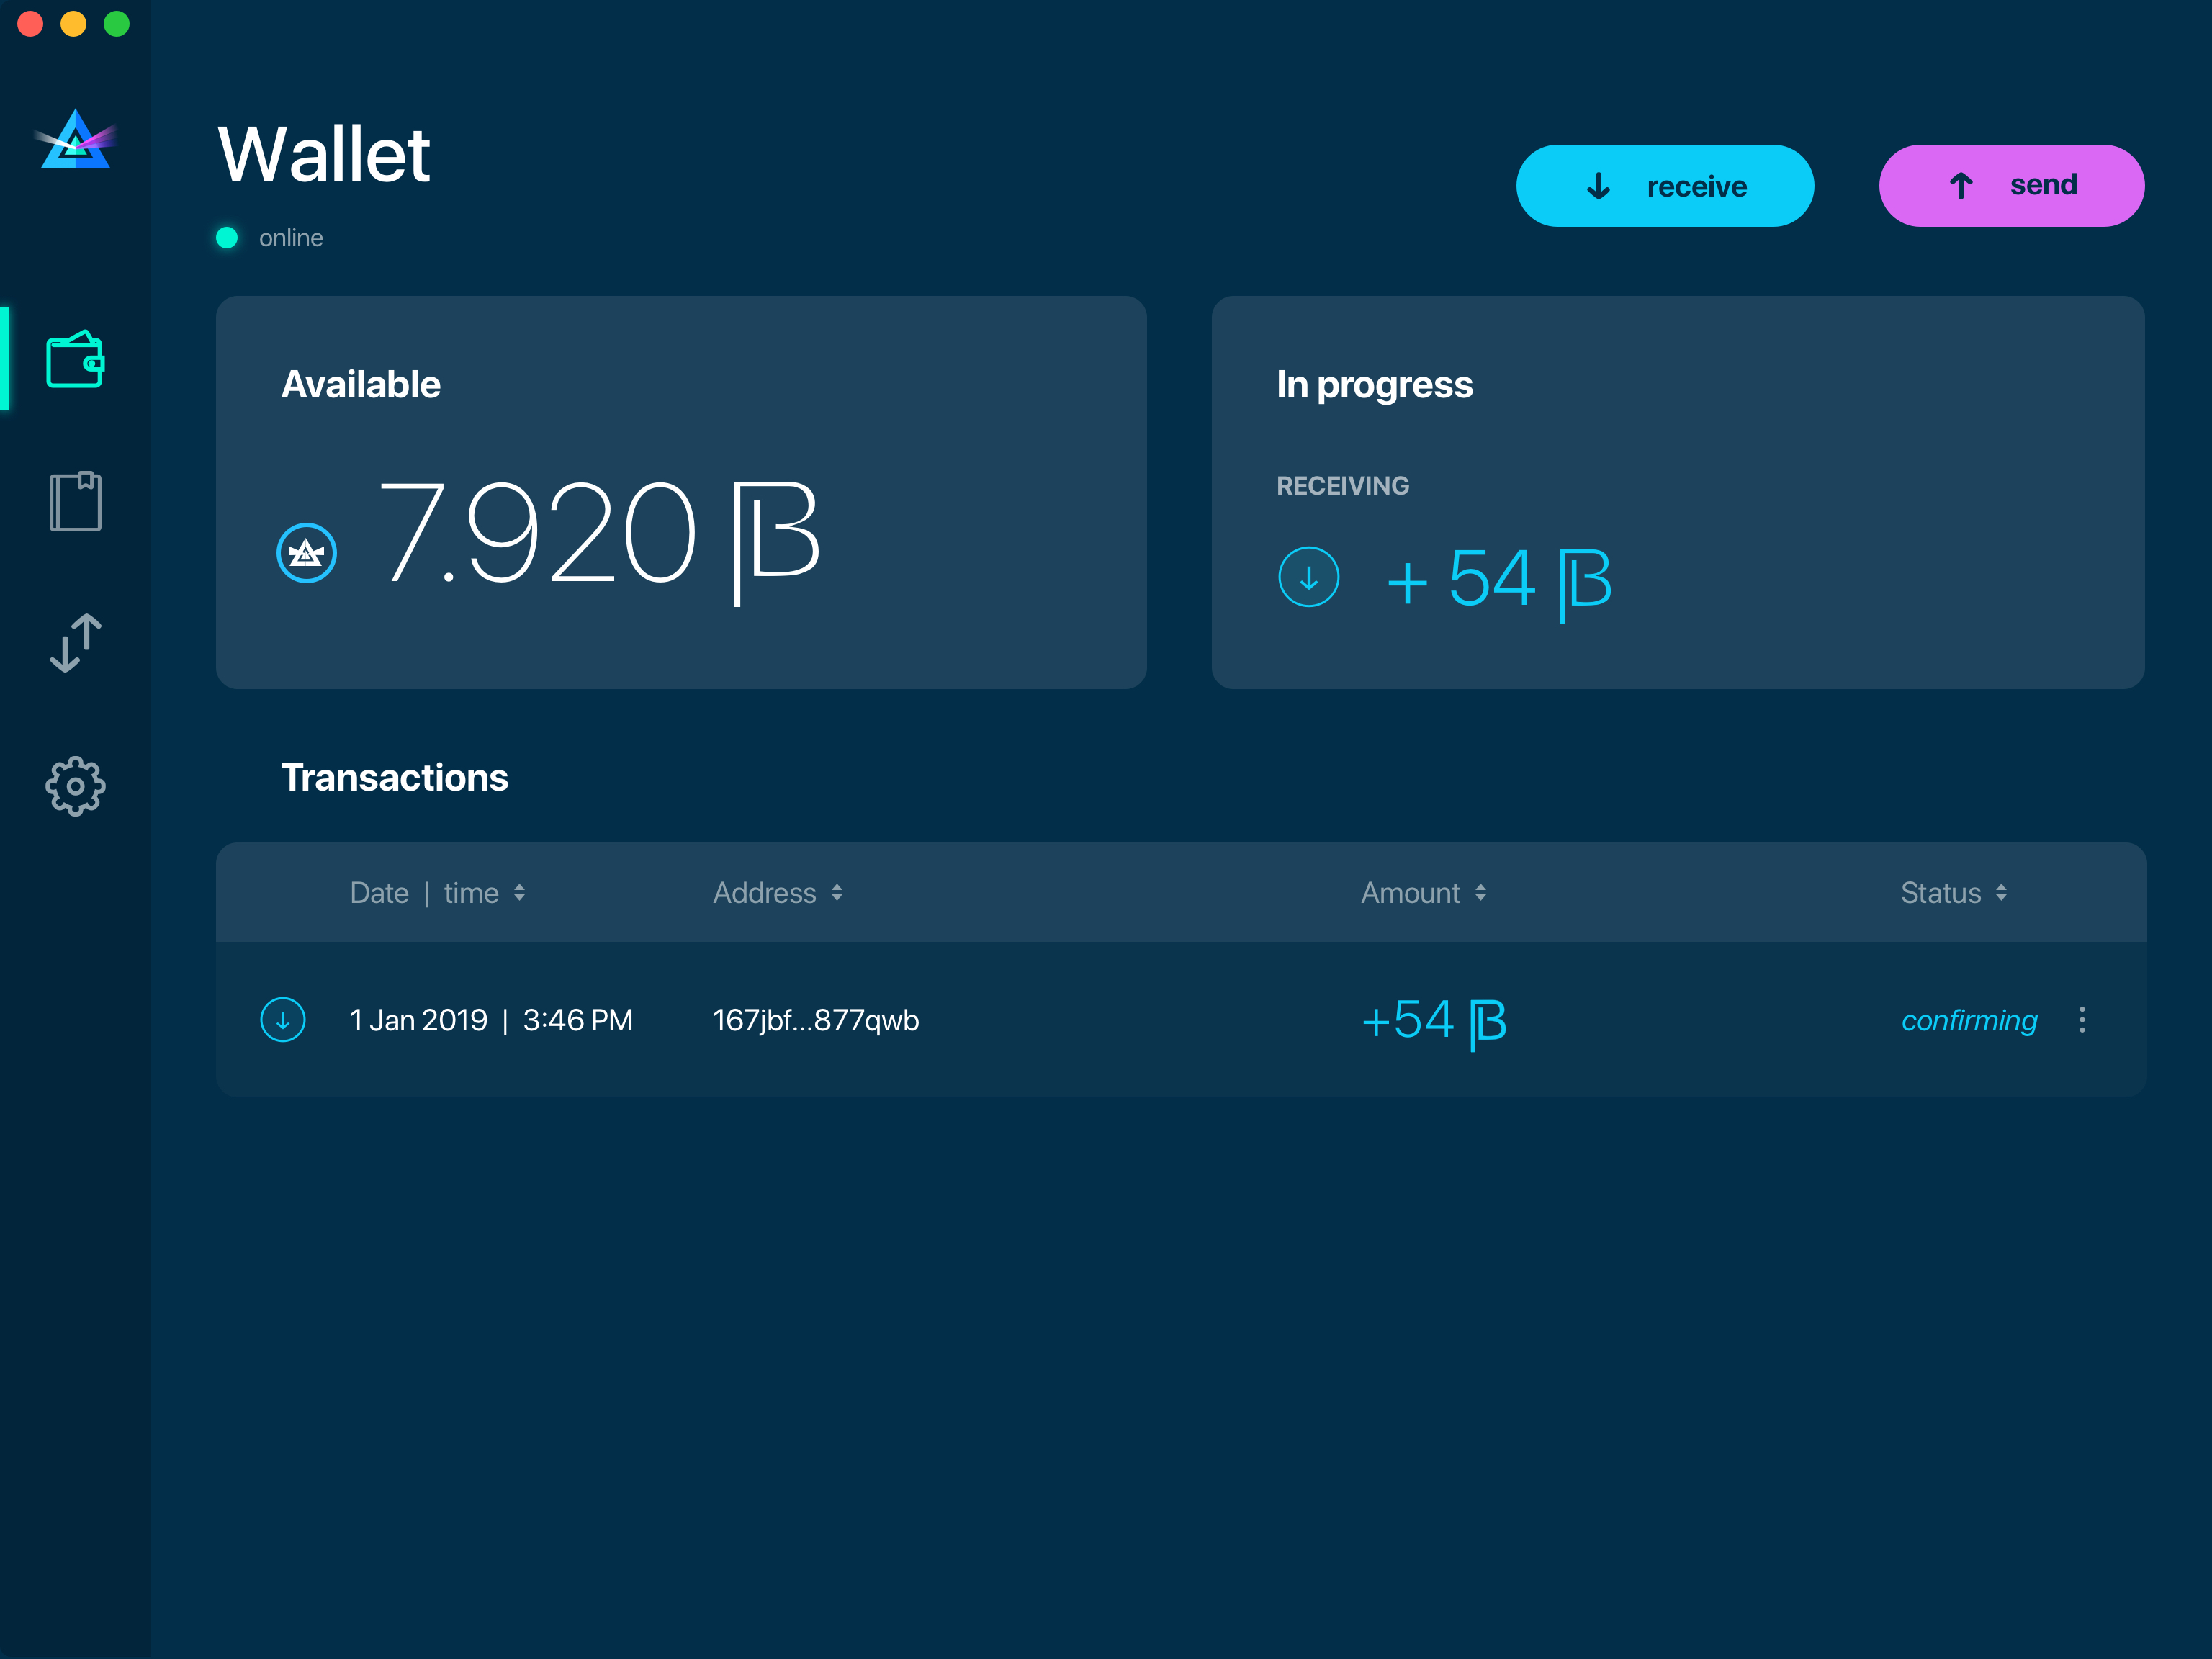
Once your wallet is created, the main screen will show up. In the future, the screen will usually open up automatically each time you open the application and successfully submit the password.
Wallet status indicator

The main screen of the wallet shows the current balance as well as the transaction history and statuses. On the left, under the Beam logo, there is a toolbar that provides navigation between different wallet screens such as Main Screen, Addresses Screen, UTXO Screen and Settings Screen.
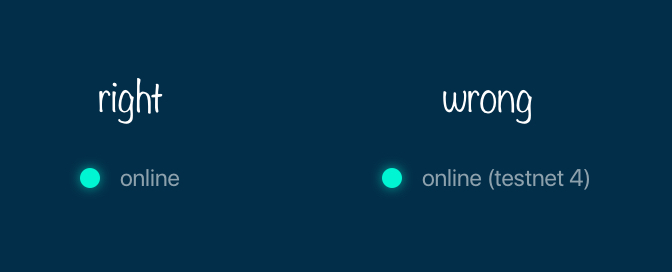
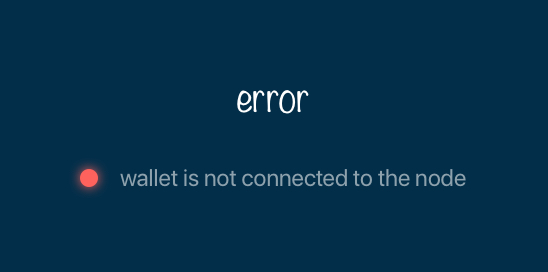
In the top left corner of the Main Screen, under ‘Wallet’, you see connection status indicator.
Green indicator means that the node is up, running and connected to peers.
Red means it is either unable to connect to the node or the node has a problem you can help to solve.
In brackets, the indicator also specifies the network to which the wallet is connected:
- Mainnet: the network with real money and actual transactions. Since this is a default choice for most users, nothing will be written in the application.
- Testnet<number> (such as Testnet3, Testnet4 etc) : staging environments for trying new features in our wallet, node and miner software. For advanced users only.
- Masternet: new features under development, if you see this name in your wallet it means that you are very early adopter or Beam code contributor otherwise you’ve probably arrived to the wrong place.
Attention
Since Mainnet is the default network for the vast majority of Beam users, nothing is written by the online status.
Finally, node connectivity node is displayed (ie. integrated, random remote node or specific node).
Transactions
‘Send’ and ‘Receive’ buttons at the top right corner help us to Sending ONT/ONG and Receiving ONT/ONG. Let’s start using the wallet!
Receiving ONT/ONG
Before starting to receive ONT/ONG for the first time, please read first about what Address is.
Here is how the process of receiving ONT/ONG looks like from a Receiver’s perspective:
- Generate an address
- Send your address to the Sender person over a secure communication channel or Send the QR code of your address to the Sender
It’s possible to reuse an address that already exists, more on that later.
Generate an address
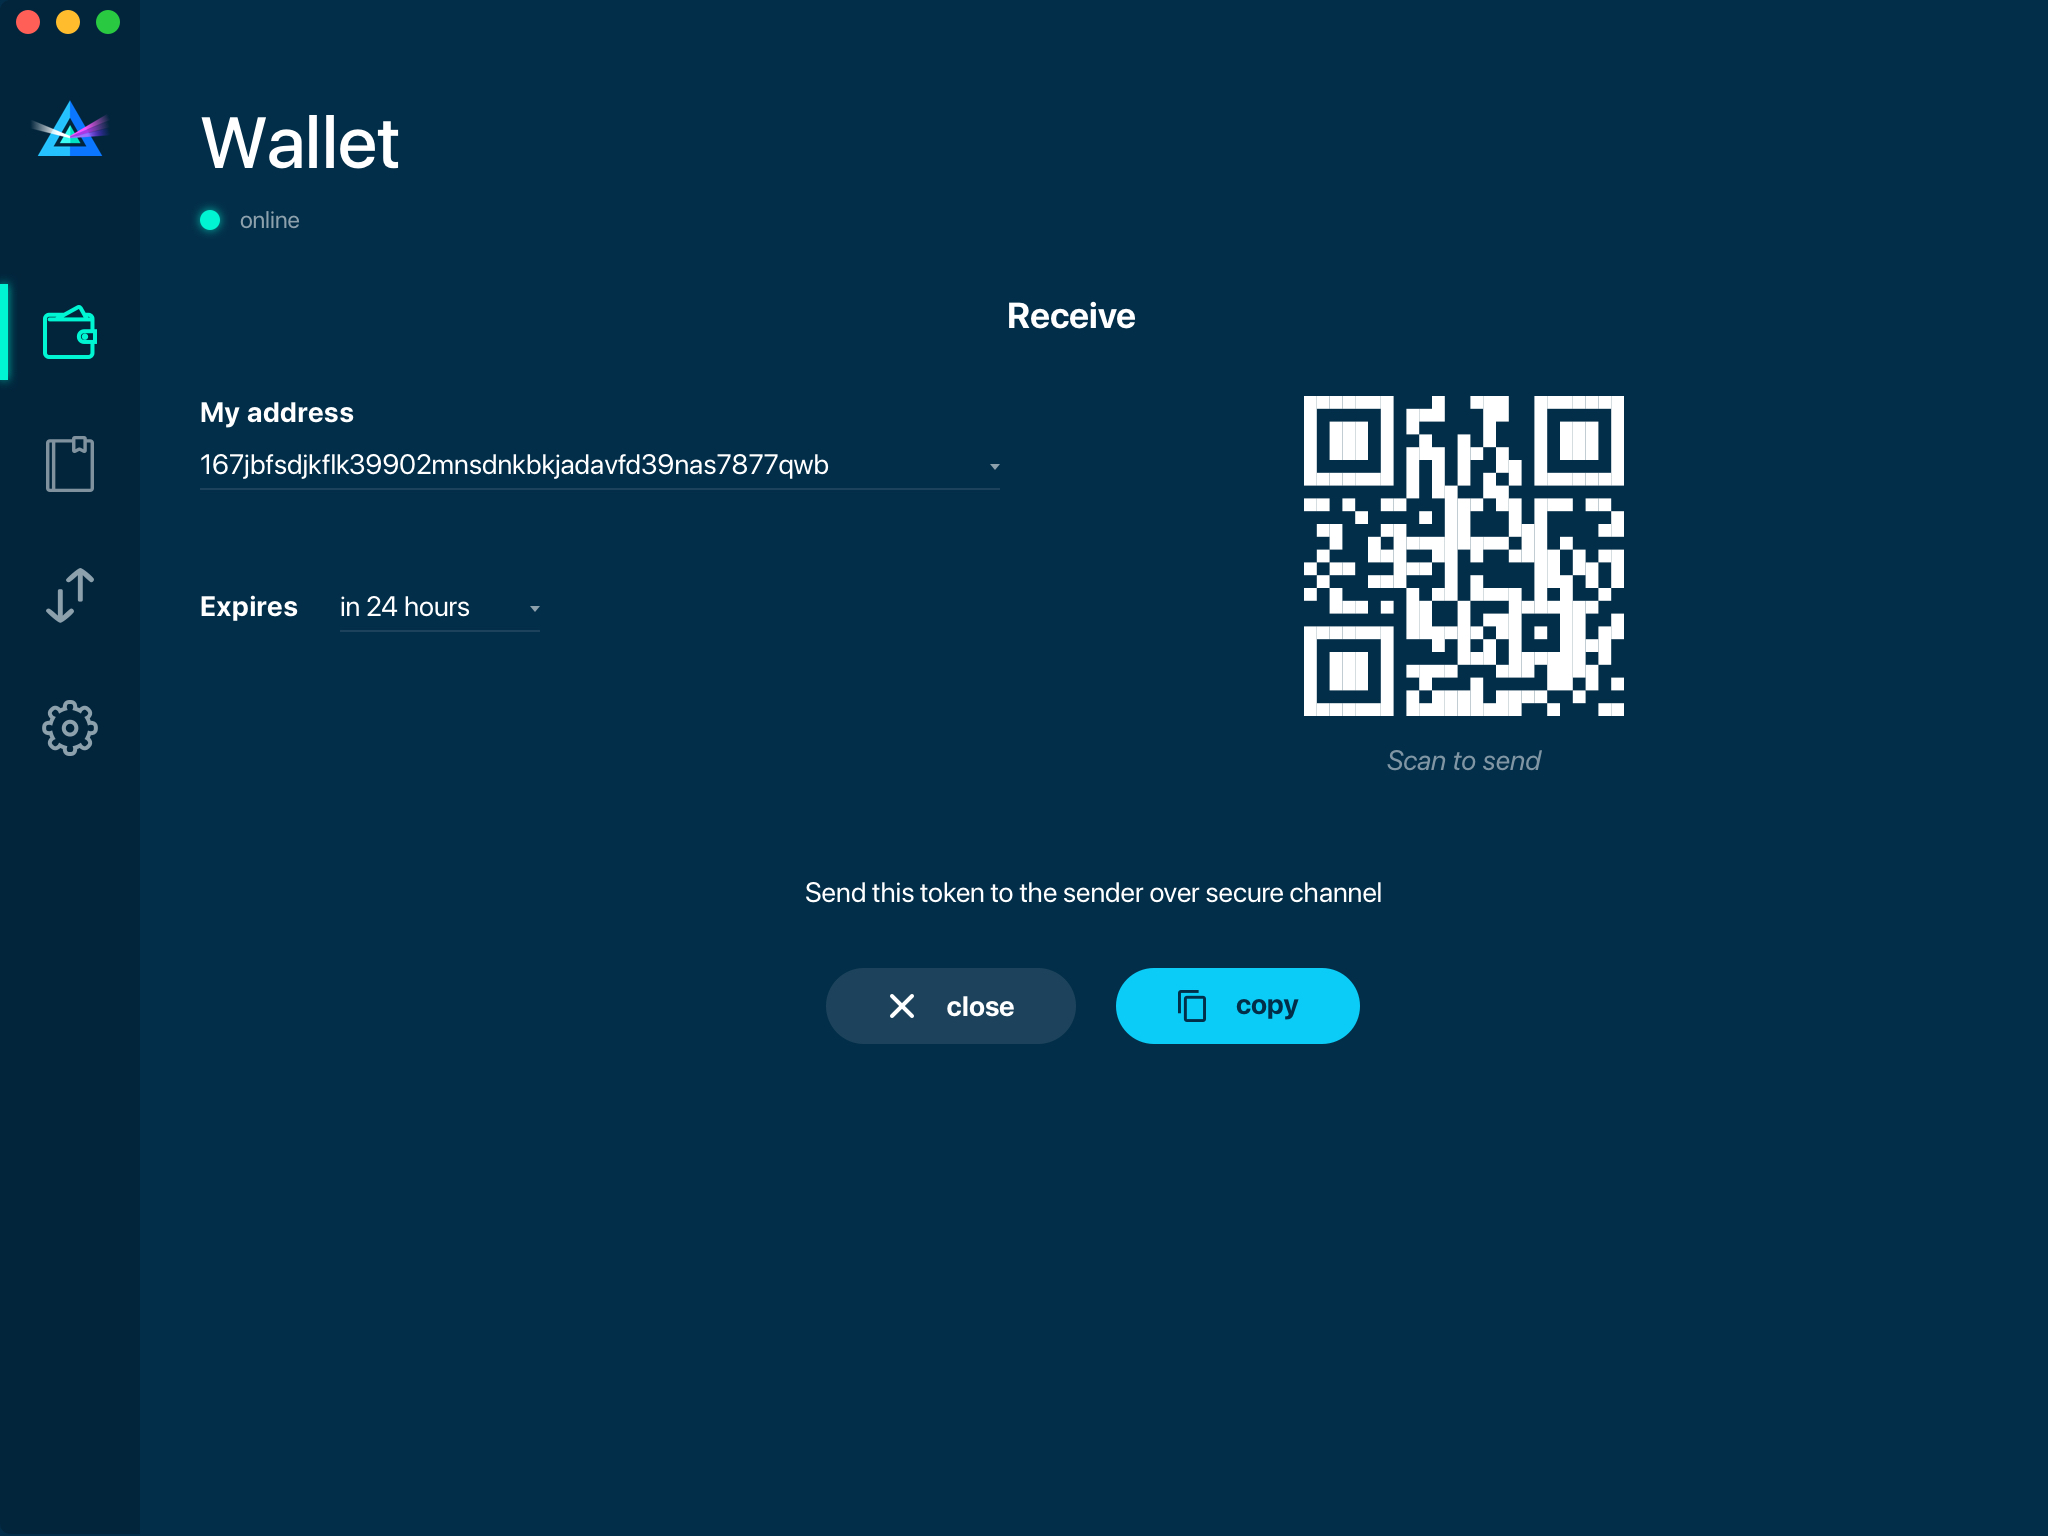
Proceed to the main screen and click the blue ‘Receive’ button at the top right corner. This will open the receive screen.

Copy and paste the newly-generated address to send it to the Sender over a secure communication channel. There are three ways to do it:
- By selecting the address and clicking
Command-CorCtrl-C(depending on your platform) - By clicking the ‘Copy’ button

Attention
You have to click ‘Close’ button in the screen for the address to become active.
QR code
If the Sender uses a mobile app, he can scan the QR code to save sending, copying and pasting the address.
Comment
You can add a comment when creating the receiving address. The comment is never sent to the network, it is only visible inside your wallet and is used for internal bookkeeping only.
The comment can be seen on the Address screen and in the extended transaction view.
Sending the address
Attention
When sending the address make sure you use a secure communication channel.
Attention
Make sure the entire address is sent to the Sender as it’s longer than it appears on the screen. Don’t forget to double check the value in whichever messenger app of your choice because viruses and malware on your computer may change your address while it’s in the clipboard.
Completing the transaction
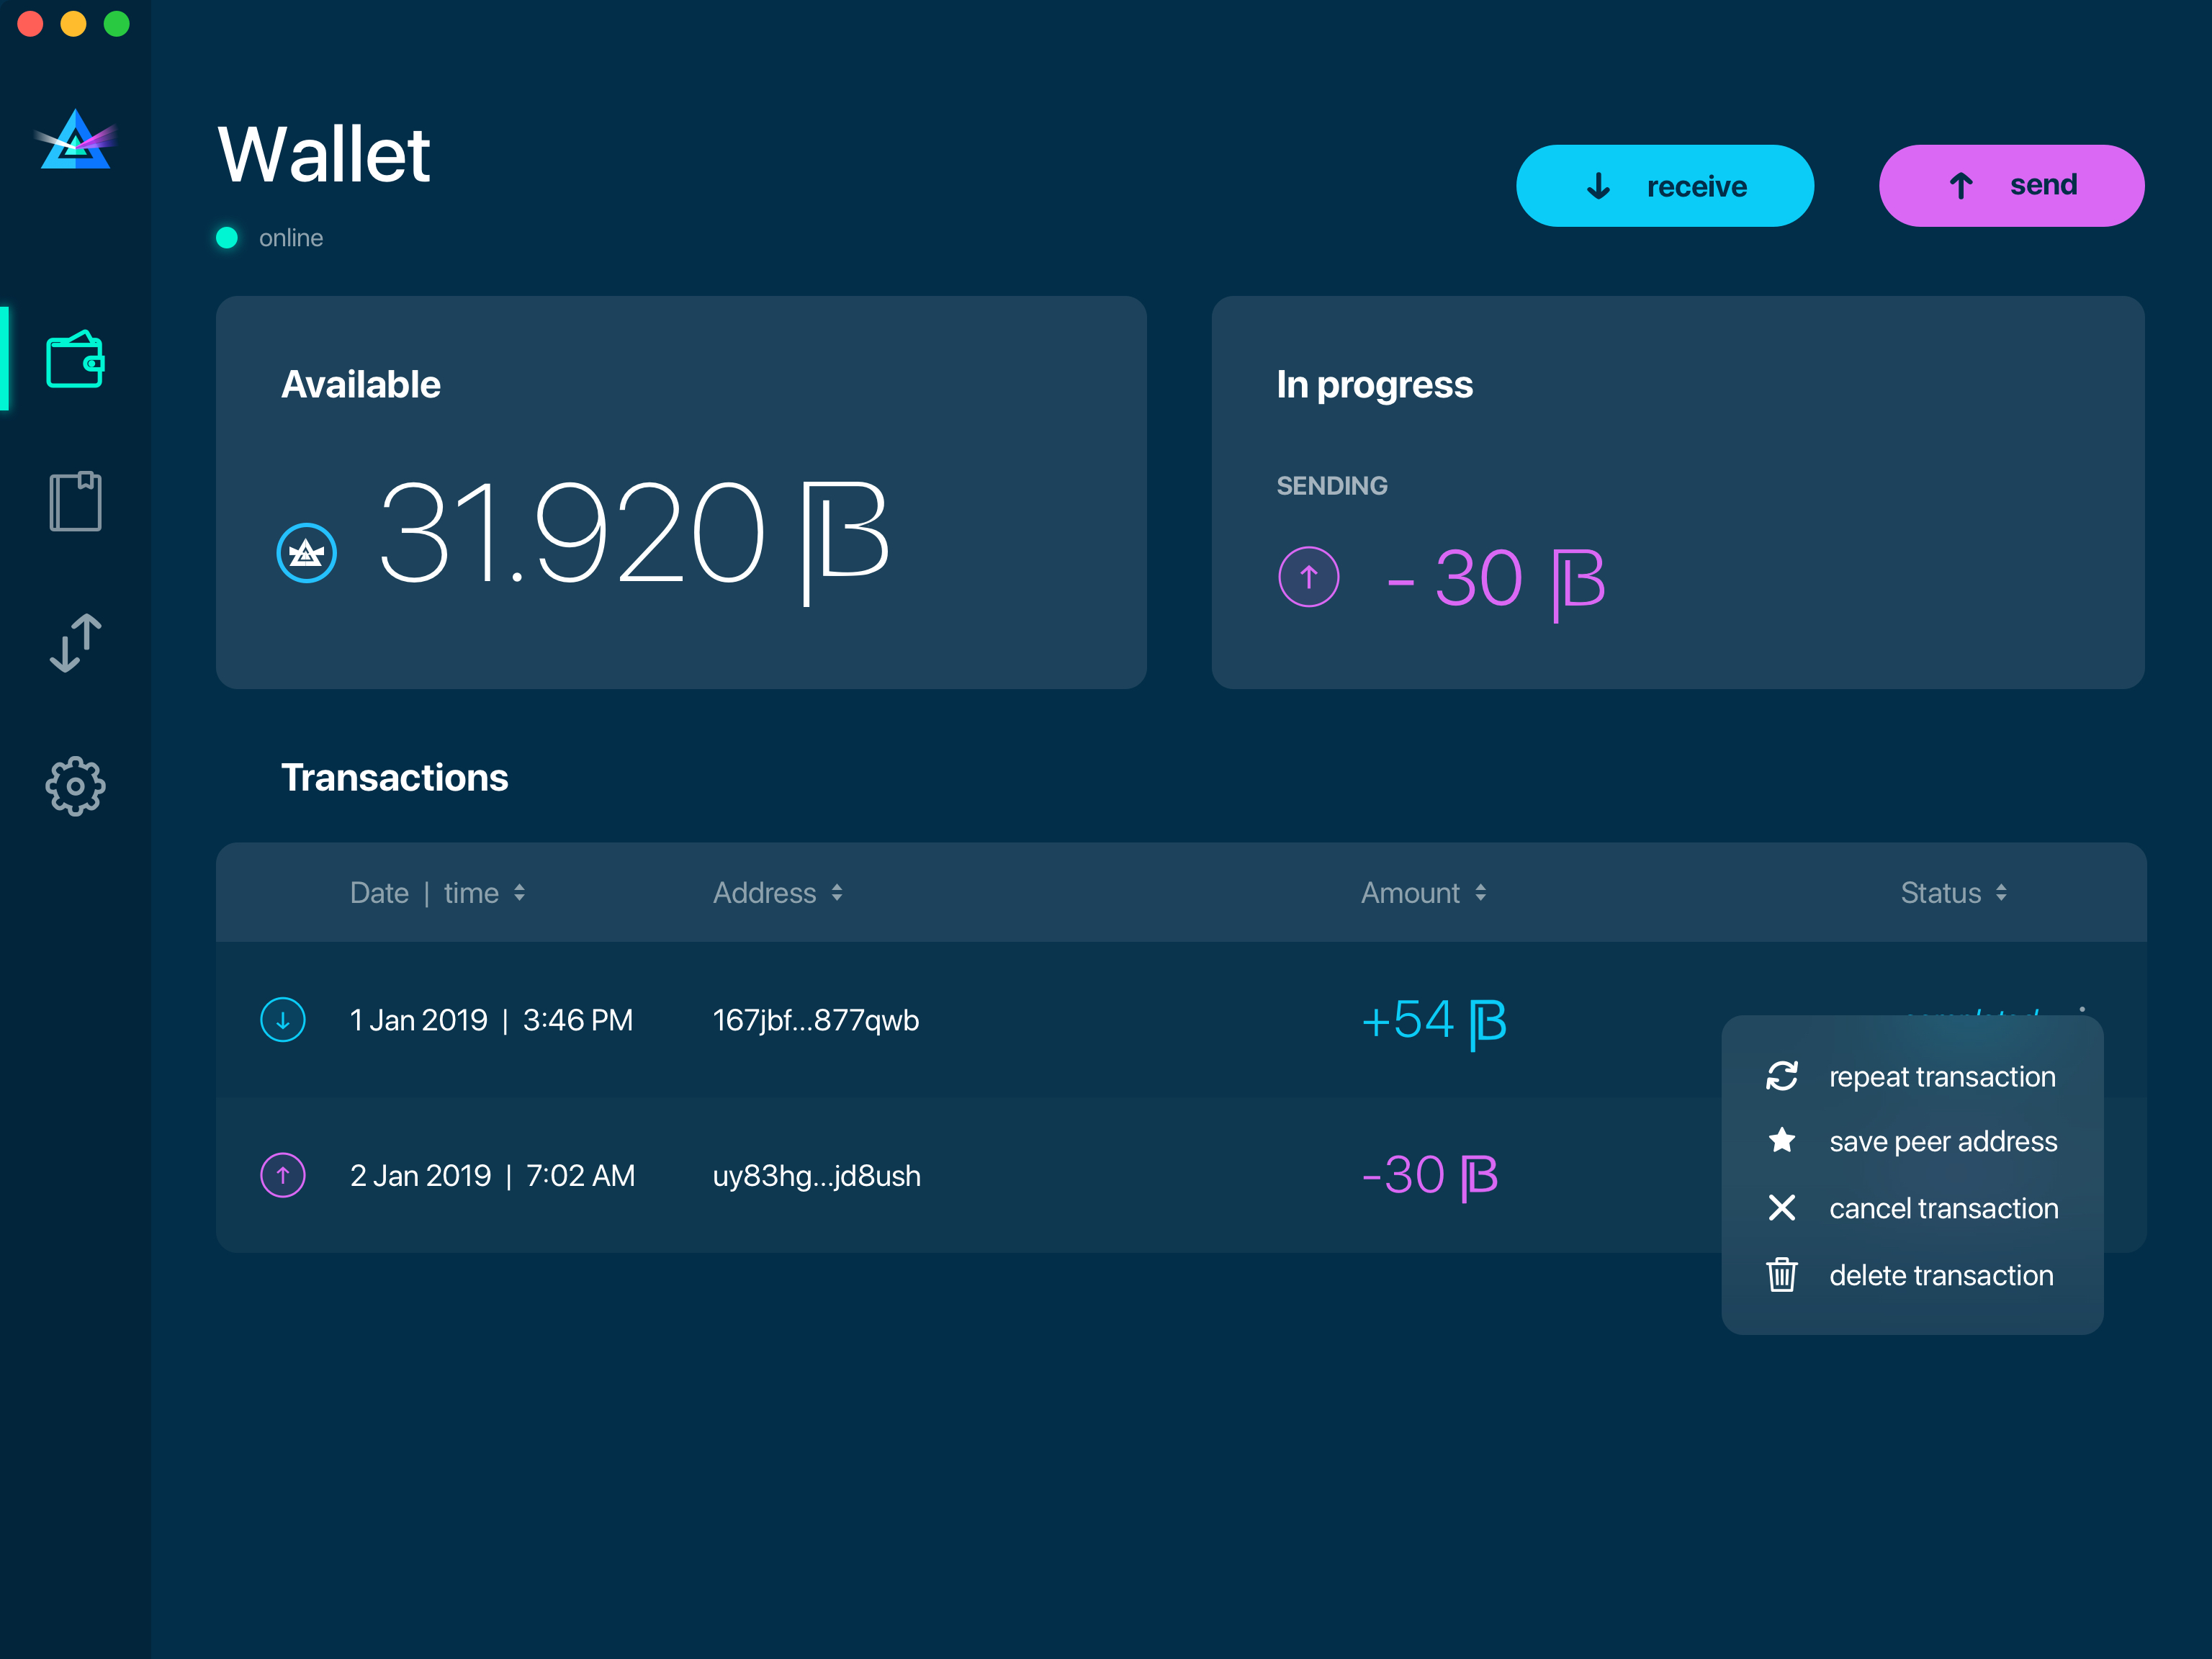
Once Sender initiates the transaction, you will see on the new transaction appear in the transaction list on the main screen.The amount sent will also appear on the ‘In progress’ box.
Normally, a transaction will instantly complete:
Once transaction is complete, the available balance will be updated .

Sending ONT/ONG
Before starting to send ONT/ONG, please read first about what Address is.
Here is how the process of sending ONT/ONG looks like from a Sender’s perspective:
- Receive the address the funds should be sent to
- Send ONT/ONG to Receiver
Receiving the address
Attention
Make sure that the address is received untampered by using a secure communication channel.
Attention
When copying the address to the Beam Wallet app please verify visually that the address in the wallet looks exactly like the address in the secure messaging app, because viruses and malware on your computer may change your address while it’s in the clipboard.
Sending funds
In order to Send BEAM you will need to click the magenta ‘Send’ button at the top right corner. This will open a Send screen.
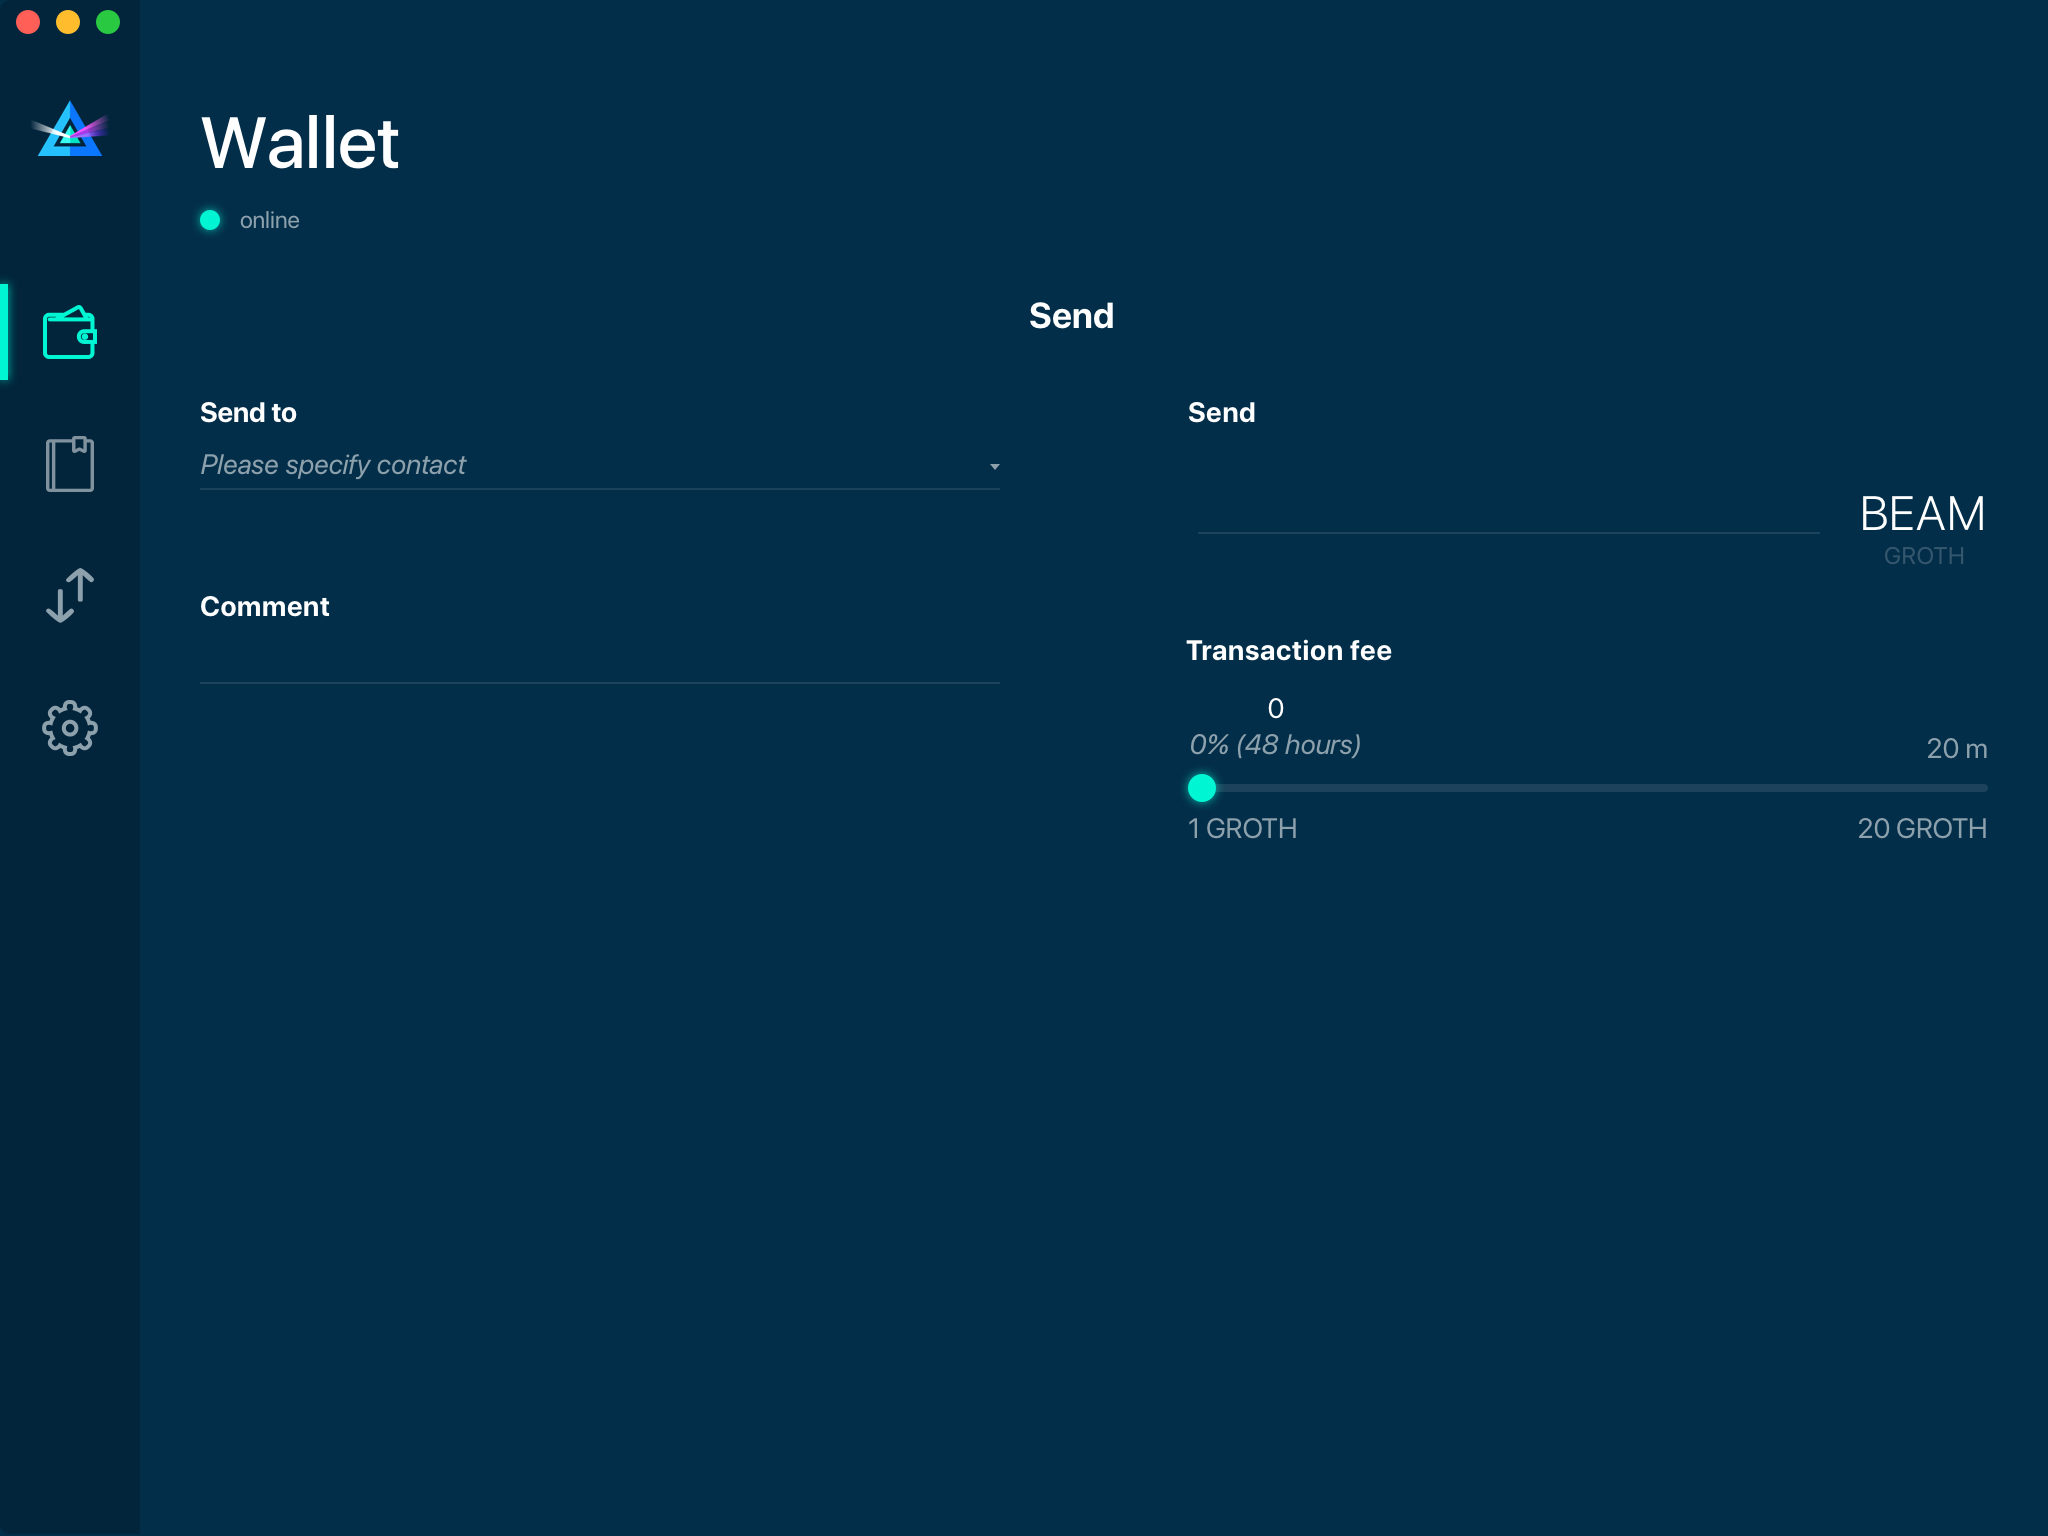
Make sure you have the correct address and paste the Receiver’s Beam address in the ‘Send To’ field.
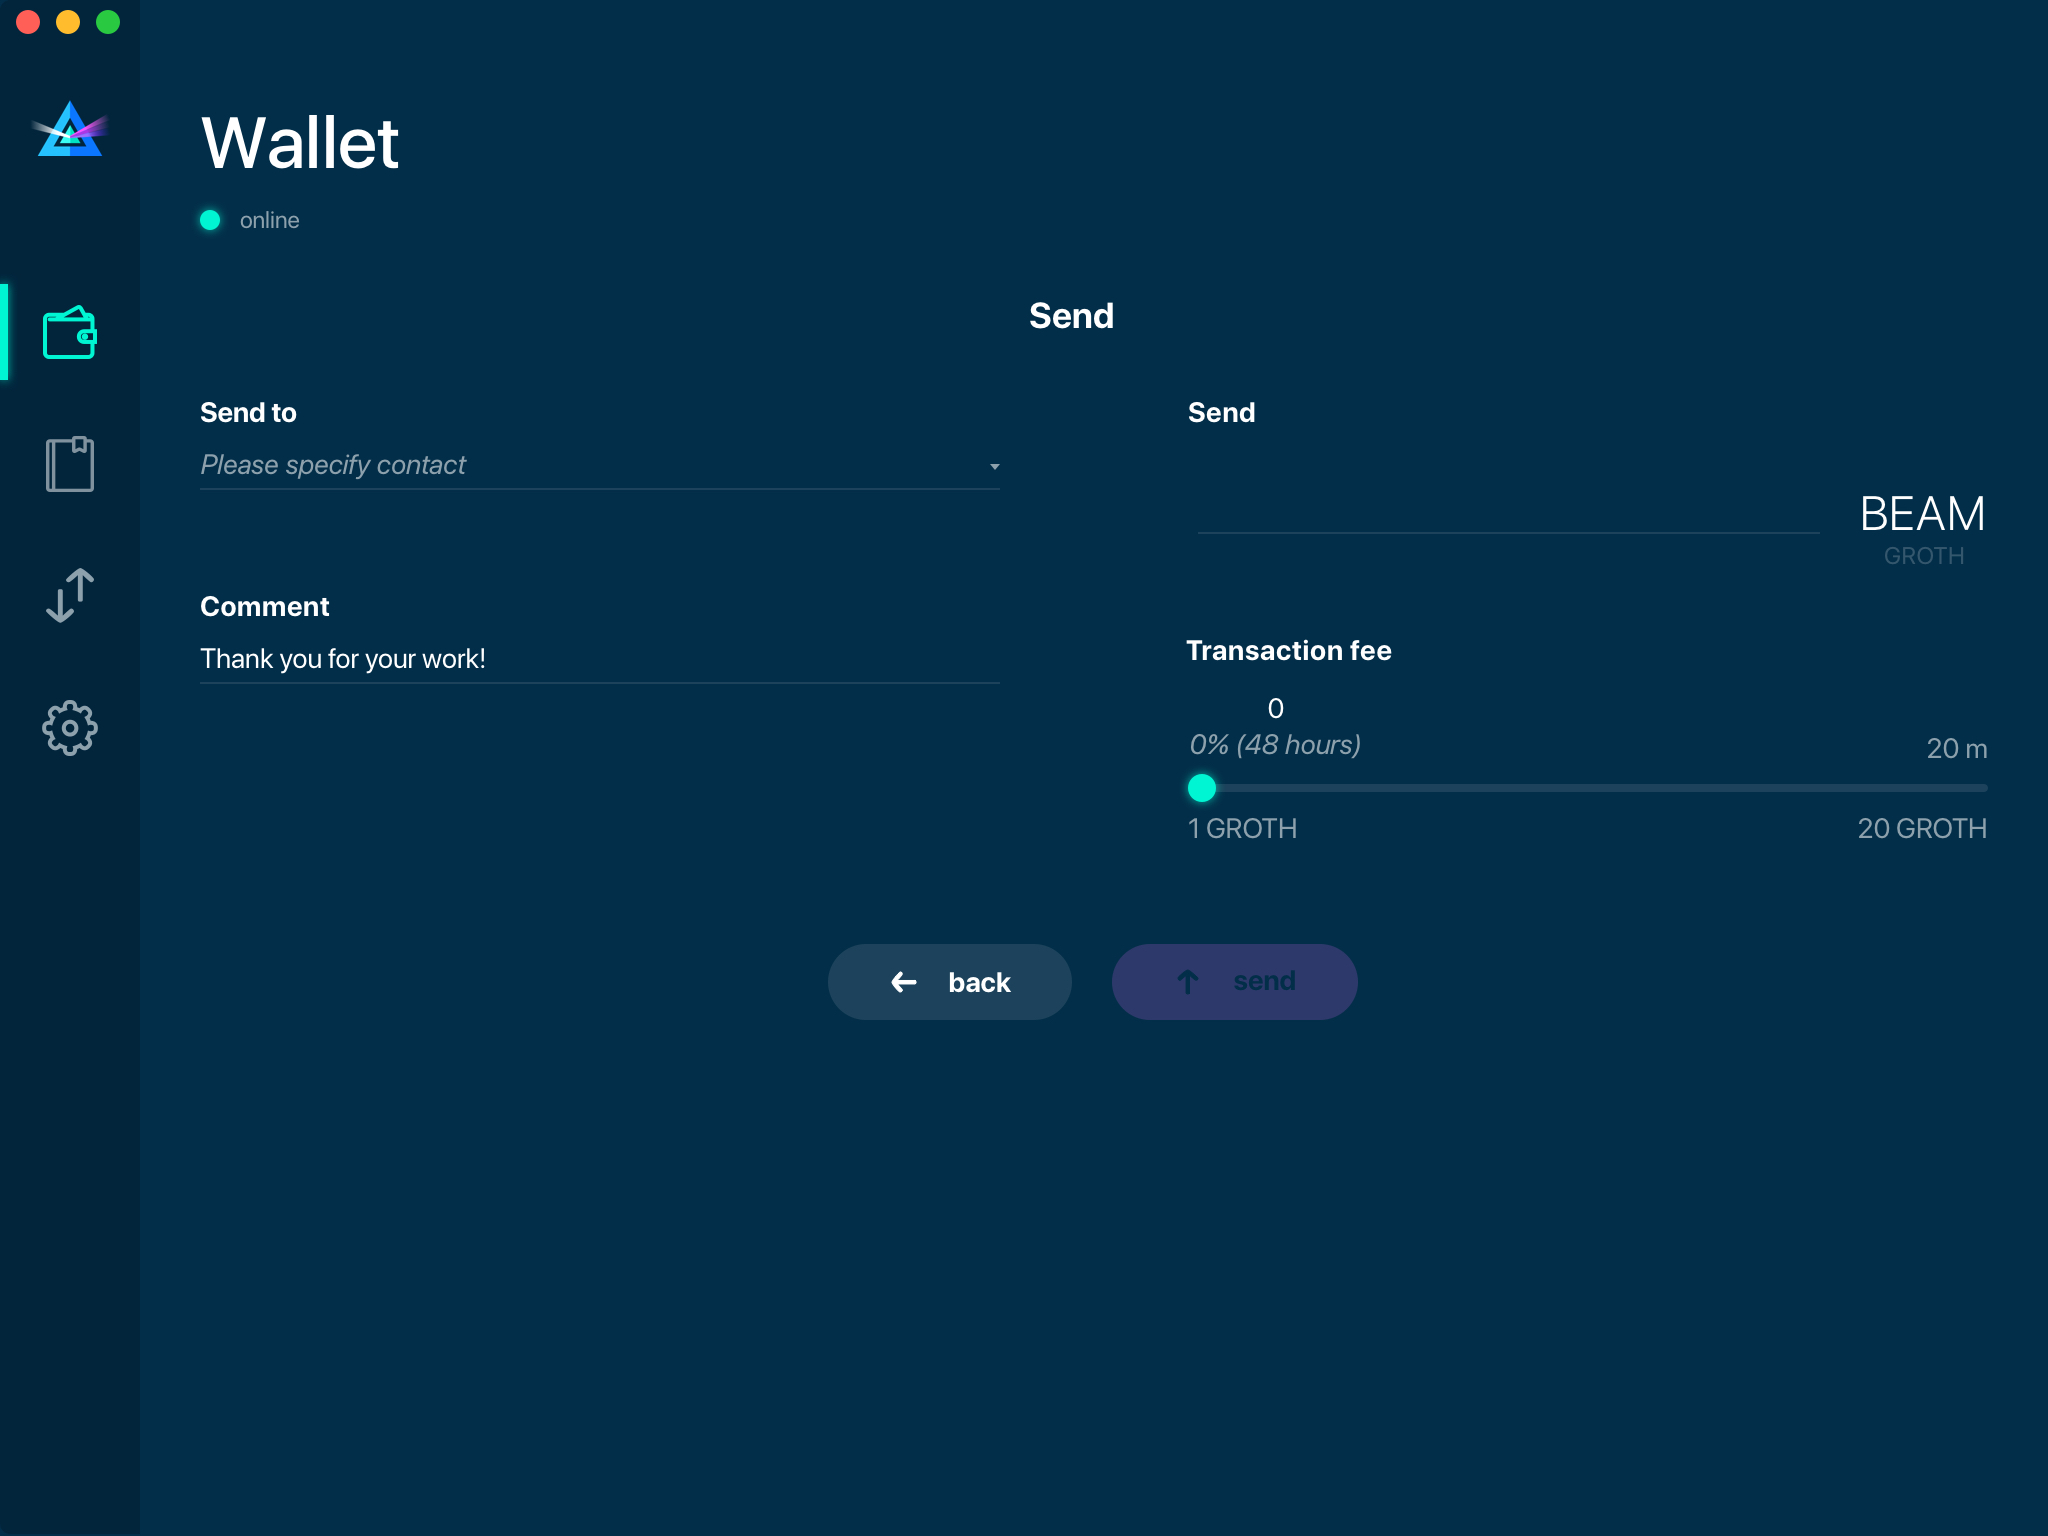
To help to identify the transaction, you may also choose to fill in the optional Comment field. The comment will remind you what or who the transaction is for. The comment is stored locally, thus it will only be visible in your wallet for bookkeeping purposes.
The comment can be seen on the Address screen:
The comment is also displayed in the extended transaction view:

Select the transaction amount in BEAM you want to send. Transaction amount is in BEAM and may contain fractional values such as 1.25 BEAM or 11.3 BEAM and the like. Keep in mind you also have to pay a transaction fee, hence the amount to send plus the fee must be equal to or less than the available balance.

Transaction fees are specified in GROTH (100 millionths of BEAM). Amount of fees you need to pay depends on the current status of the network and average fee sizes. Simply said, the higher transaction fee will help miners to prioritize your transaction. To determine the current average fee size use Beam Blockchain Explorer.
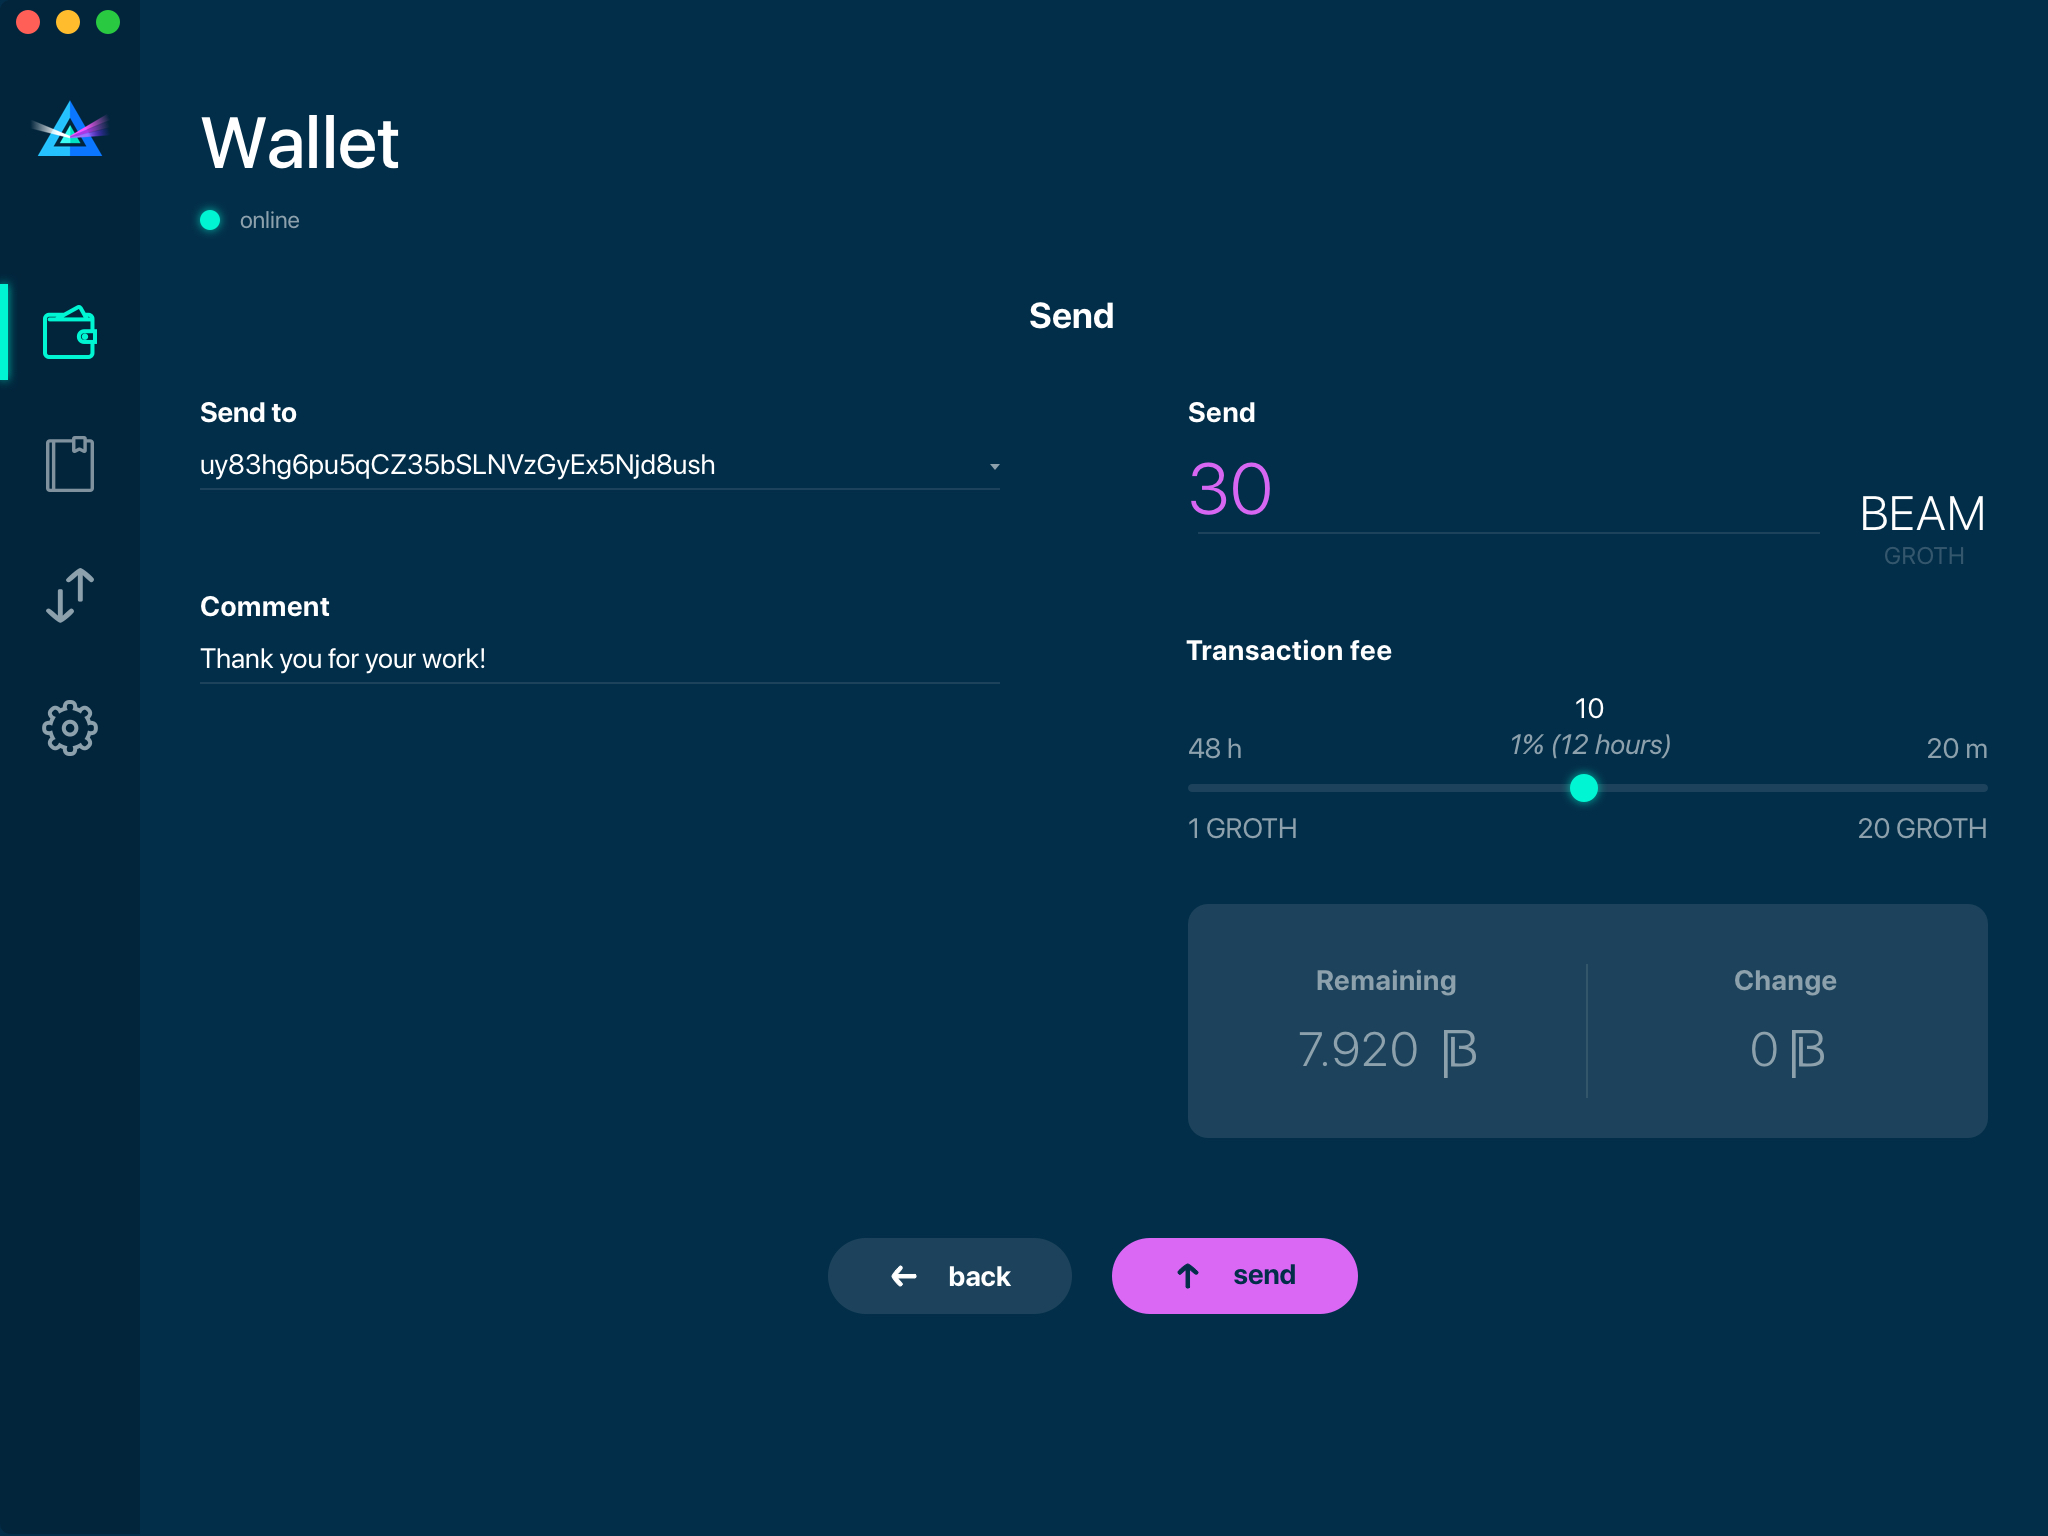
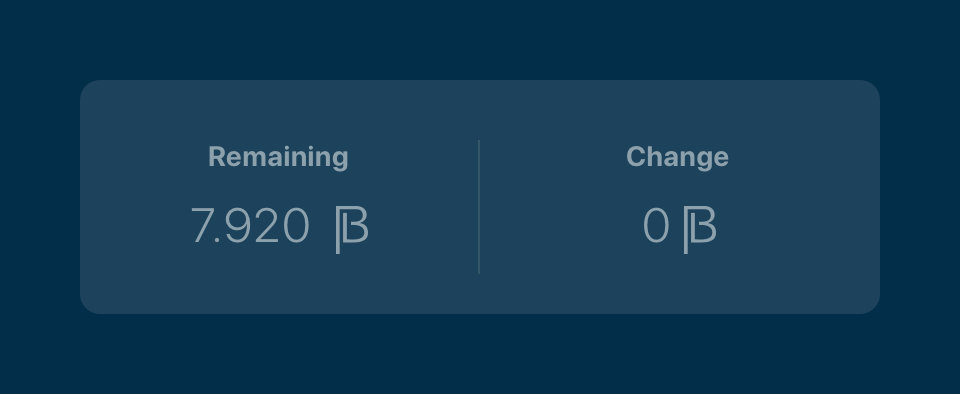
You can see the remaining amount of BEAM in your wallet and the change that will be received after the transaction.
After you click ‘Send’ you will see a confirmation with the most important transaction details:

Completing the transaction
Once you confirm, the transaction is sent to the Receiver’s wallet. If Receiver’s wallet is currently offline or if the network is loaded, you might see the transaction appear ‘In Progress’ on your transaction list. Once the transaction is complete, it will be sent to the nodes and shown as ‘Confirming’.
Note
While a transaction is in ‘In Progress’ you can cancel it by clicking on the dropdown to the right of the transaction row and then select ‘Cancel’. The other party will receive notification that the transaction was either ‘Cancelled’ or ‘Failed,’ and funds+fee that were allocated for this transaction will become available again. It is not possible to cancel a transaction in ‘Confirming’ or ‘Completed’ states.
Warning
If your transaction appears as ‘In Progress’ for a notifiably long time, it means the Receiver is not online.
Attention
If the transaction was not sent to the nodes, for any reason, it will expire after 1440 blocks, or roughly 24 hours. This is done to avoid a situation in which one of the Wallets did not send a created transaction to the nodes and the UTXOs remain locked forever.
Restoring funds
This process allows you to restore your funds directly from the blockchain. It is useful in the scenarios such as:
- You’ve got a new device and would like to use your wallet on it
- You forgot your local password and can’t access your funds
Attention
With Beam, only funds are stored on blockchain. Everything else, such as your active addresses, contacts or transaction history can’t be restored.
Note
Very soon exporting transactions history for backup and bookkeeping purposes will be implemented.
Before restoring funds on a machine the wallet was already installed, manually remove the wallet database file as described in Files and Locations. No action is required on a new machine.
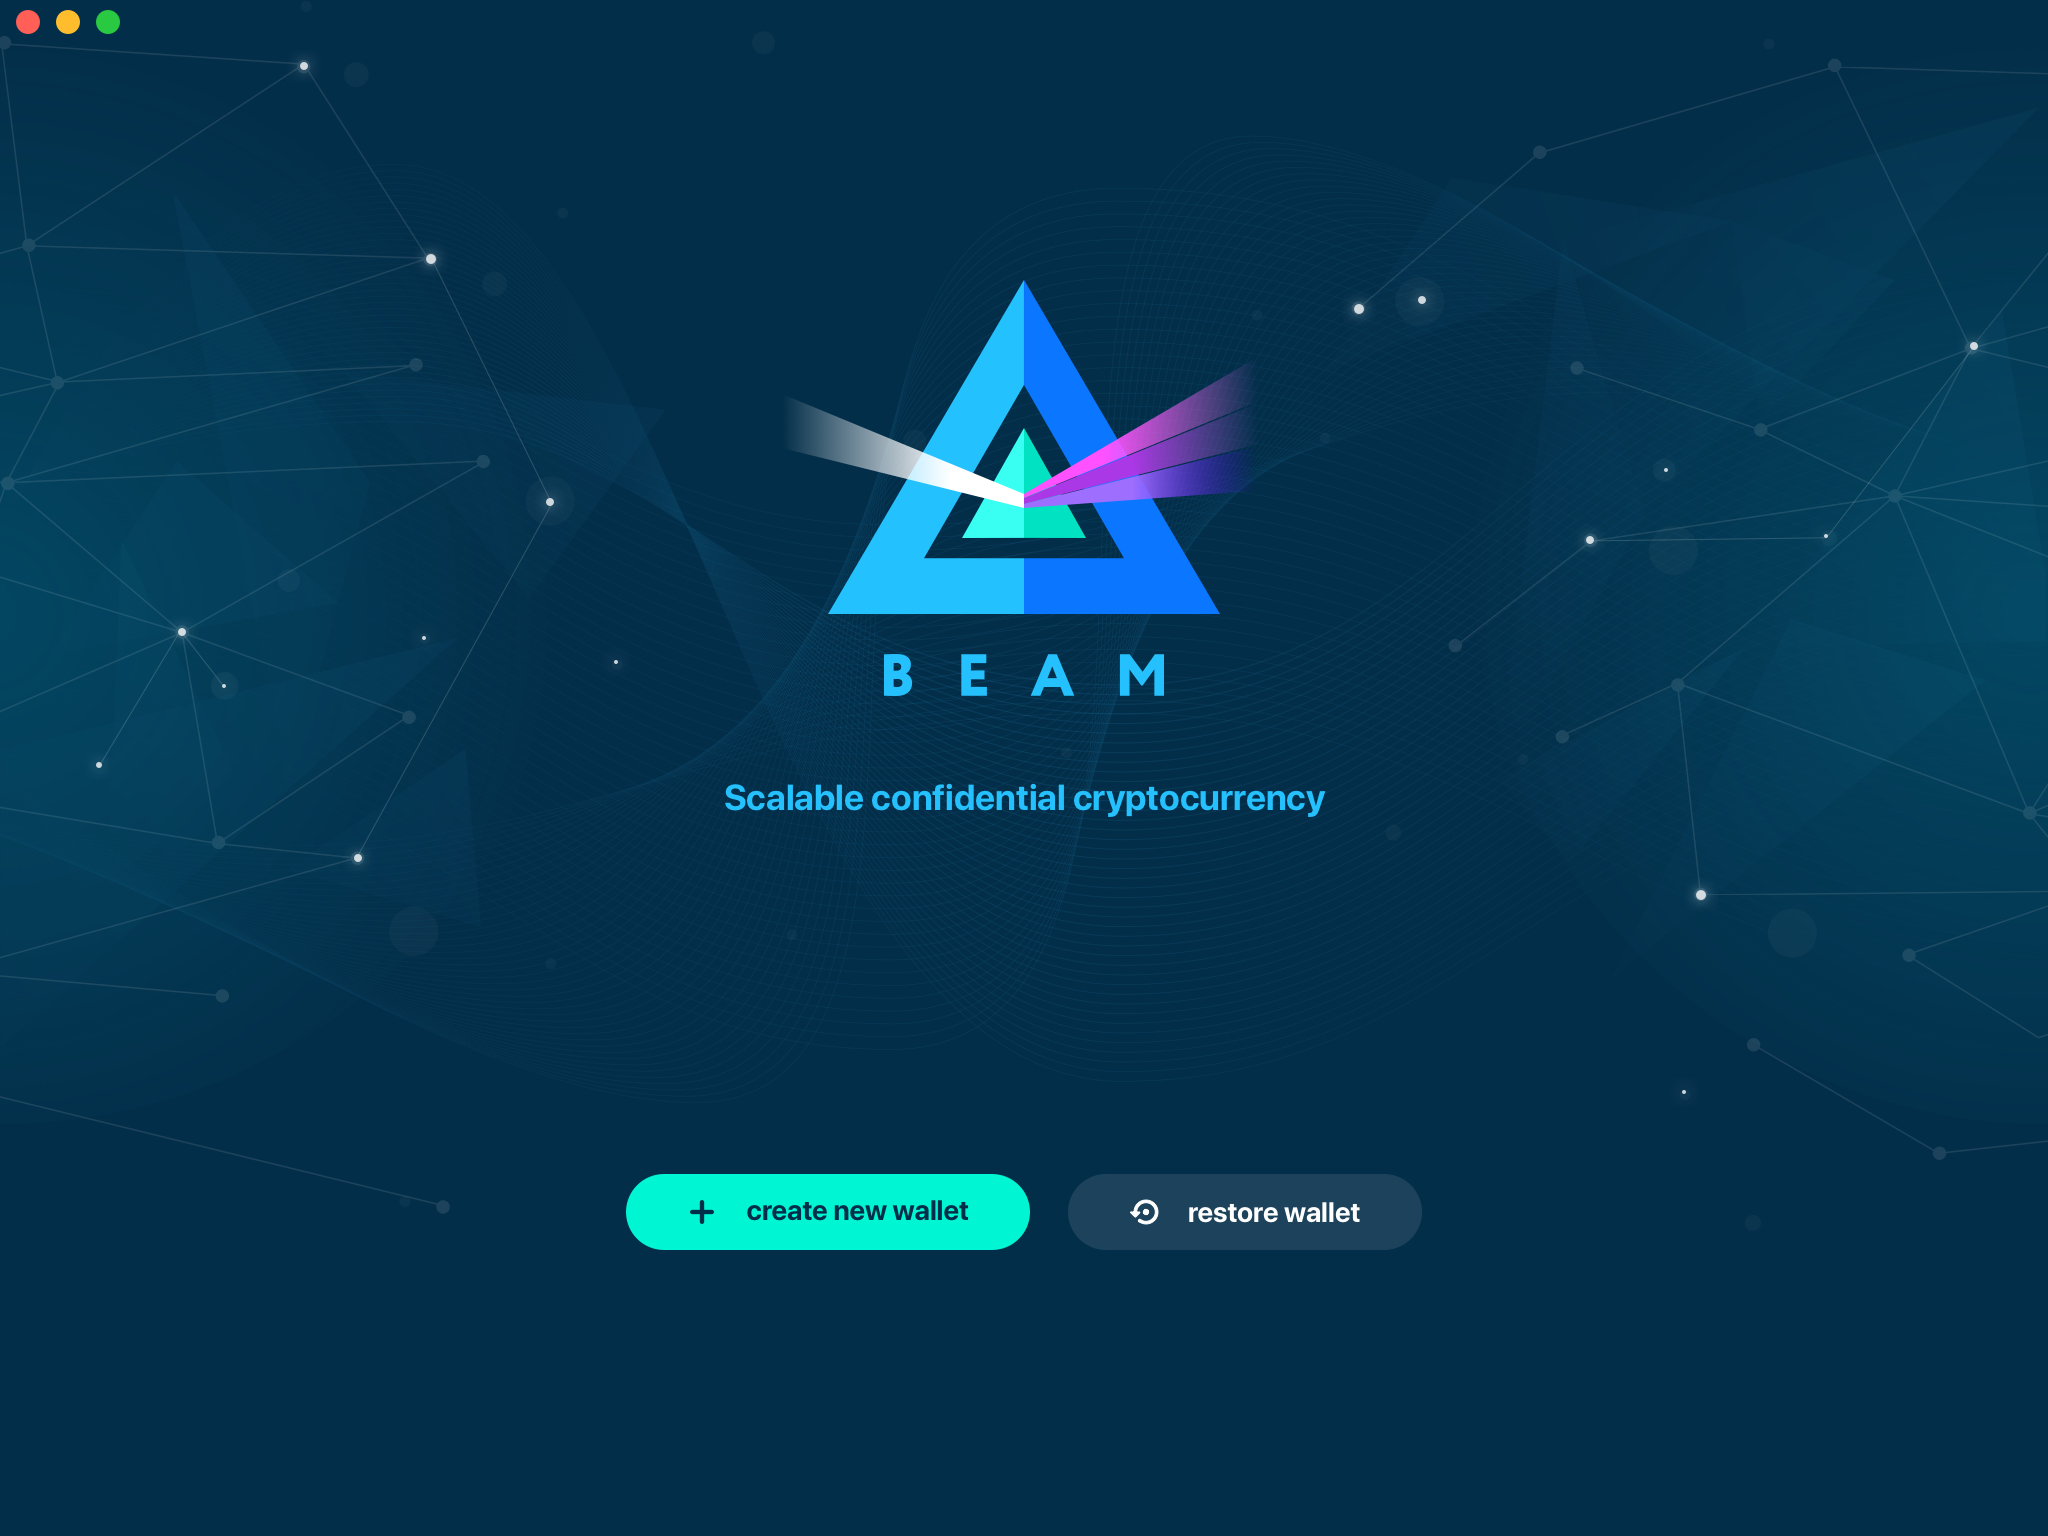
Start the BEAM desktop wallet app and press ‘Restore wallet’ button.
You will be asked to enter your seed phrase. Time to get the phrase out from your safe locker and type the words in.
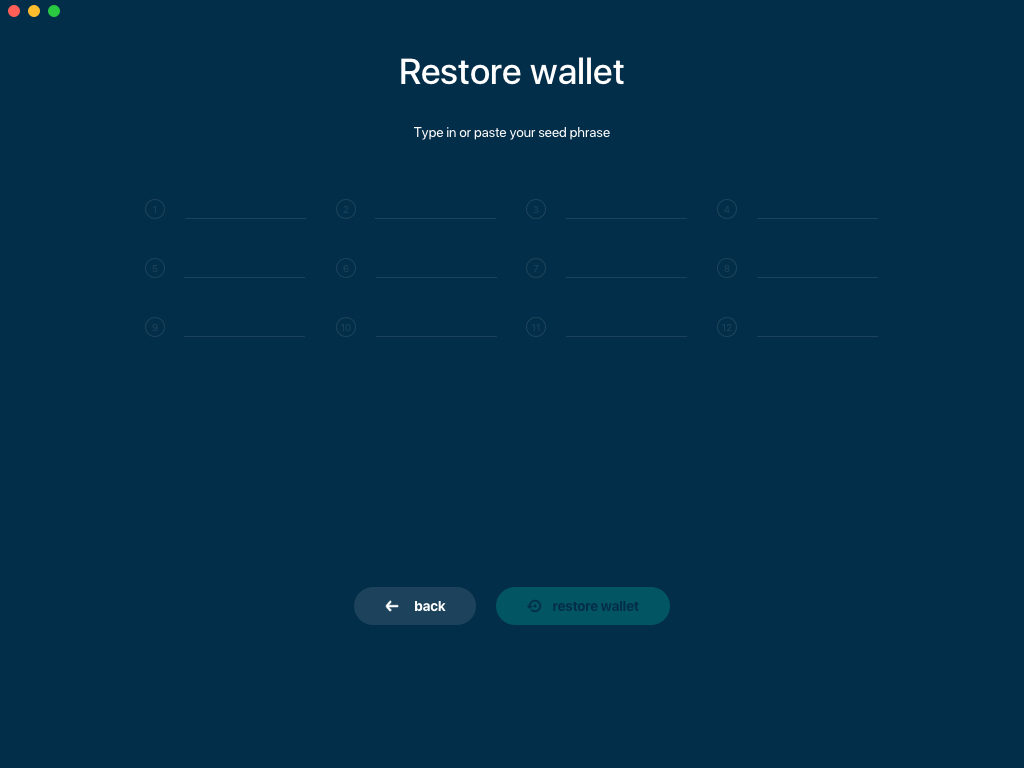
Warning
If a wrong word was typed or an existing word was misspelled, your funds will not be restored successfully. Example: ‘litt_el_’ instead of ‘litt_le_.’

Did you checked your spelling? Once you are sure, click ‘Restore wallet.’
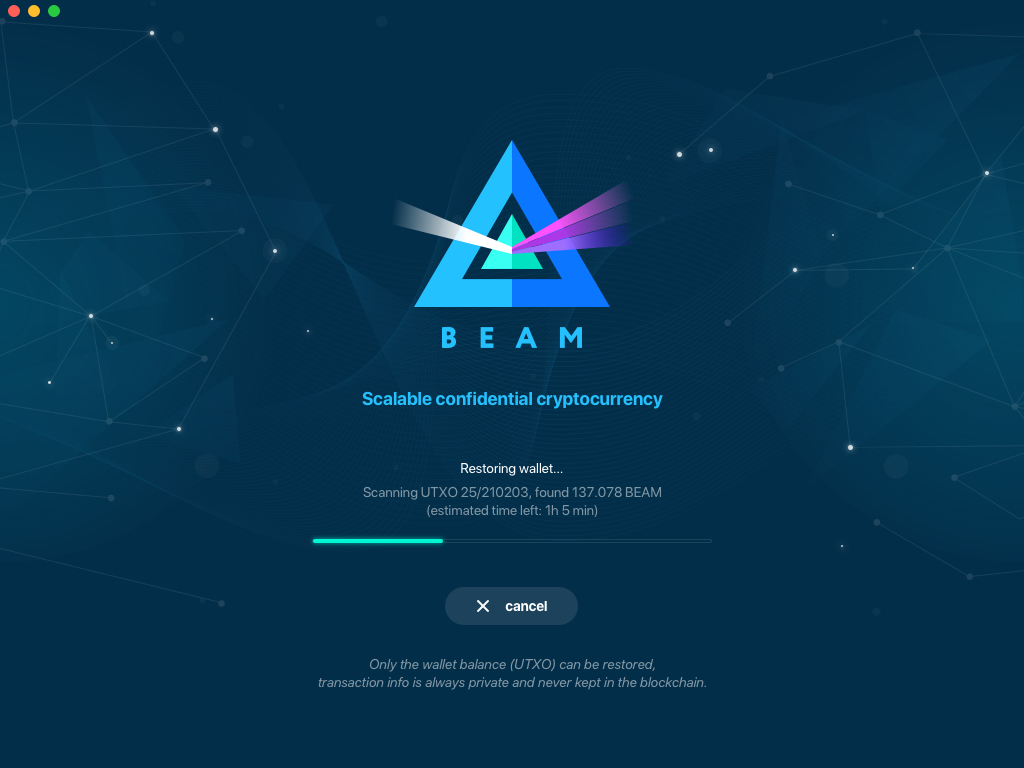
Upon completion, you’ll see the main screen of the wallet with your restored funds.
Note
Please be patient, restoring funds is a thorough and time consuming operation.
Attention
If the available balance is zero, it means that one or more words from your seed phrase weren’t typed correctly or are wrong.
Address
Let’s define the meaning of address in the BEAM ecosystem: BEAM is always sent from one address to another. Both sending and receiving addresses are alphanumeric tokens that uniquely define the transaction endpoints.
A person can create as many addresses as required. The address creation process is explained in Receiving BEAM.
Example: There are two wallets: one belongs to you and the other belongs to Alice. You have created one address to receive money from Alice and another address to send money to Alice. Since you can generate multiple addresses, Alice will never know that she’s receiving money from the same person that she is sending the money to (unless you want her to know).
Example: There are three wallets: one belongs to you, one belongs to Alice and another belongs to Bob. You have created one address to receive money from Alice and another address to receive money from Bob. Alice and Bob will never know that they are sending money to the same person.
Same address can be used for sending and receiving money.
Example: you have created an address to send money to Alice. Alice can see the address the money came from and can send money to the address back to you.
Attention
For ultimate privacy, it is advised to have a dedicated address for every transaction (ie. for both Sending or Receiving).
Attention
Although not recommended, an address can be reused until it had reached its expiration (24 hours since when it was generated).
Example: Imagine you’ve created the address with expiration interval of 24 hours and immediately sent it to Alice. In the next 24 hours, Alice will be able to send BEAM to you as many times as she likes, reusing the same address of yours.
Warning
Reusing same addresses, created with longer expiration interval, can be convenient yet the tradeoff of decreased privacy should be kept in mind.
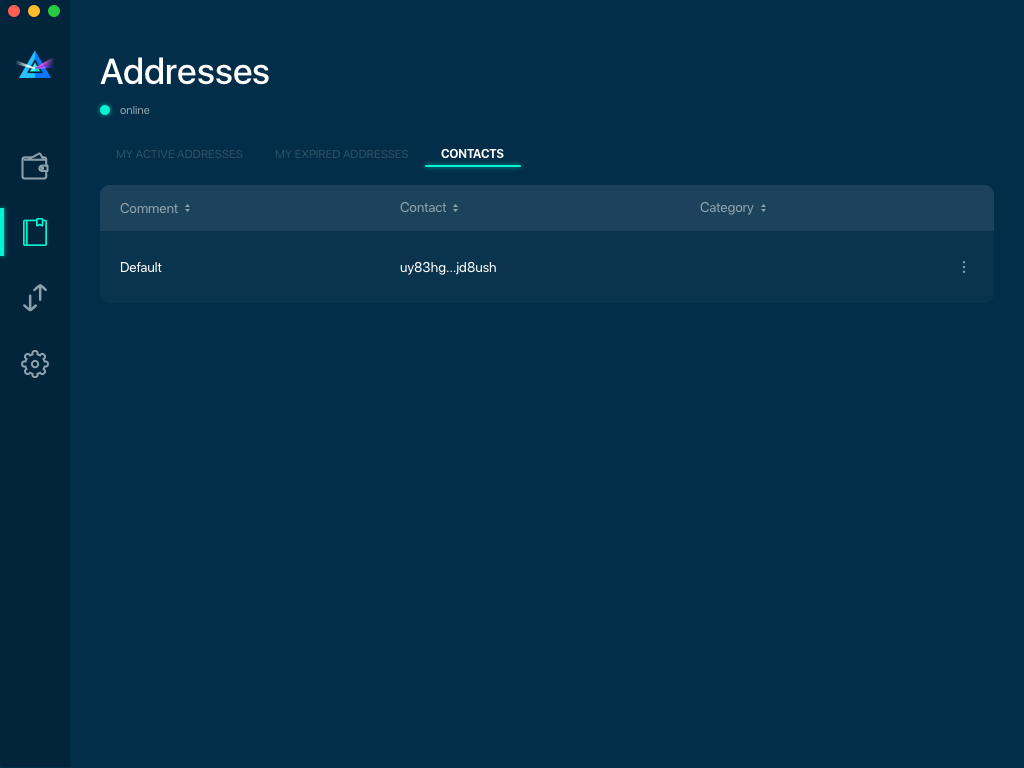
Address screen
The address screen lists all your incoming and outgoing transactions. It includes the address, comments, date address was created and date address expired of each transaction. All the data in this screen is only stored locally in your wallet and is not related to the blockchain in any way.
Note
A new address is generated for each transaction. Yes, you heard that right! That address can be seen in your active or expired addresses list.
Upon Beam Wallet desktop app installation, a single address is created by default. The address has a default expiration time of 24 hours. You can always create a new one by going to the Receive screen. You can see all your active addresses in the ‘My Active Addresses’ tab.
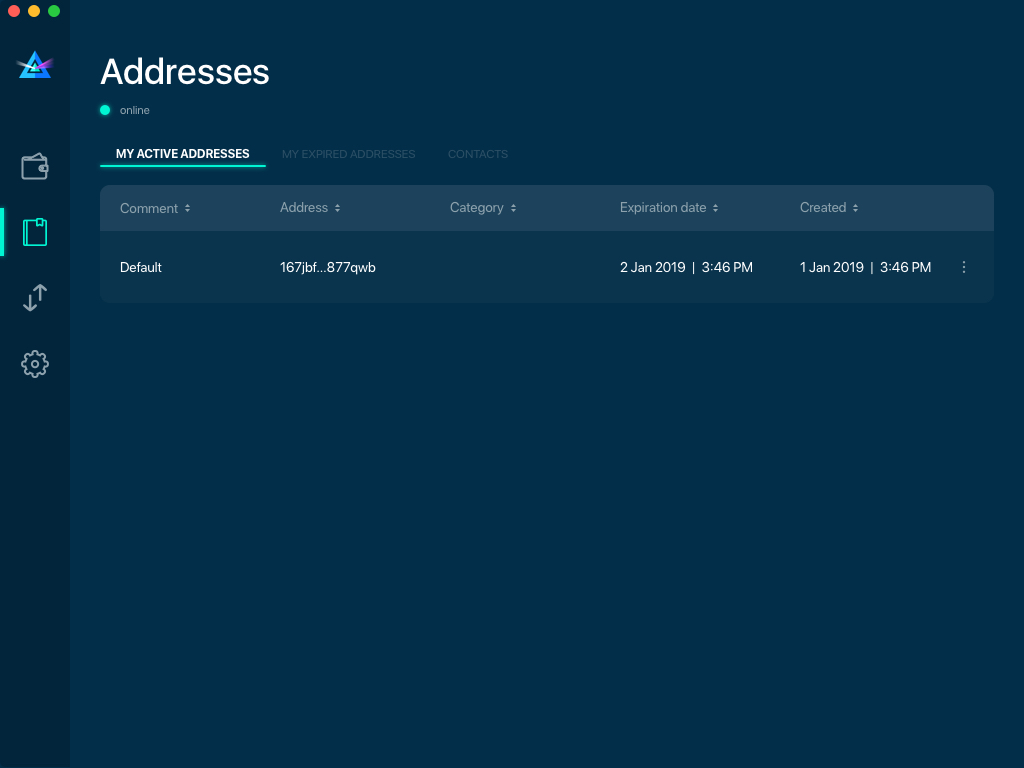
Each address has a default expiration time of 24 hours. An expired address becomes inactive and you won’t be able to be use it again. You can see the expired addresses listed under ‘My Expired Addresses.’

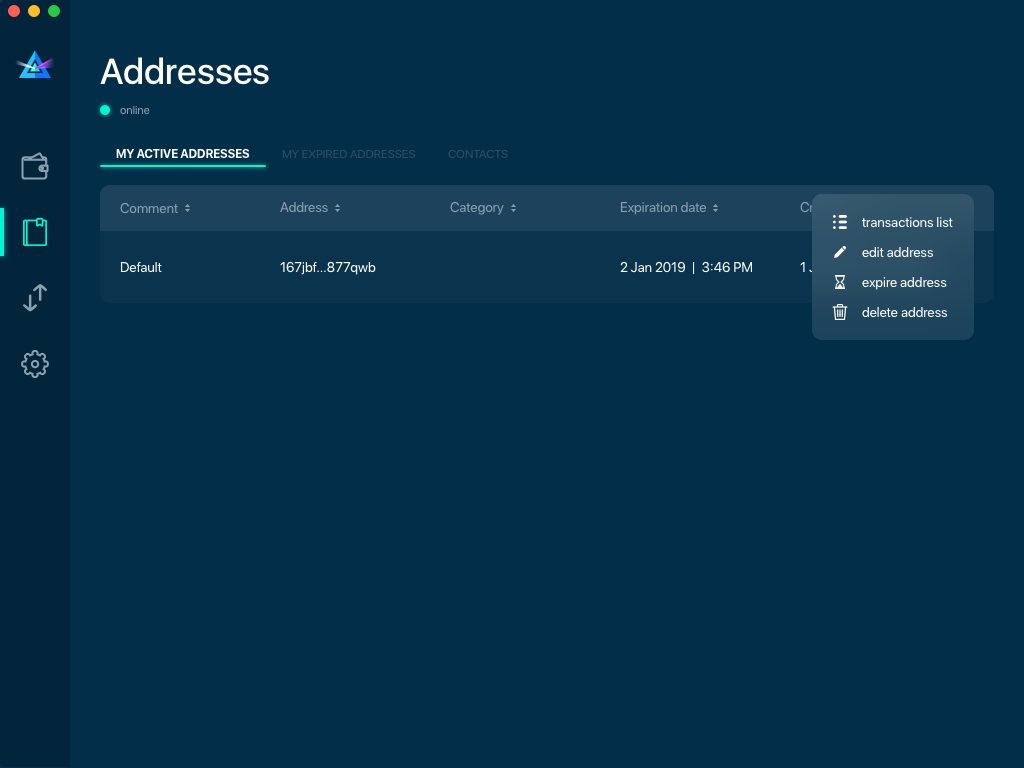
When you’ll click the three dots located to the right of any address, the menu with addtional address actions will open. You can manually edit or delete any address choosing ‘Edit’ or ‘Delete’ items from the menu.
In the ‘Contacts’ tab, you can see every address that sent you BEAM or to which you’ve sent BEAM to.
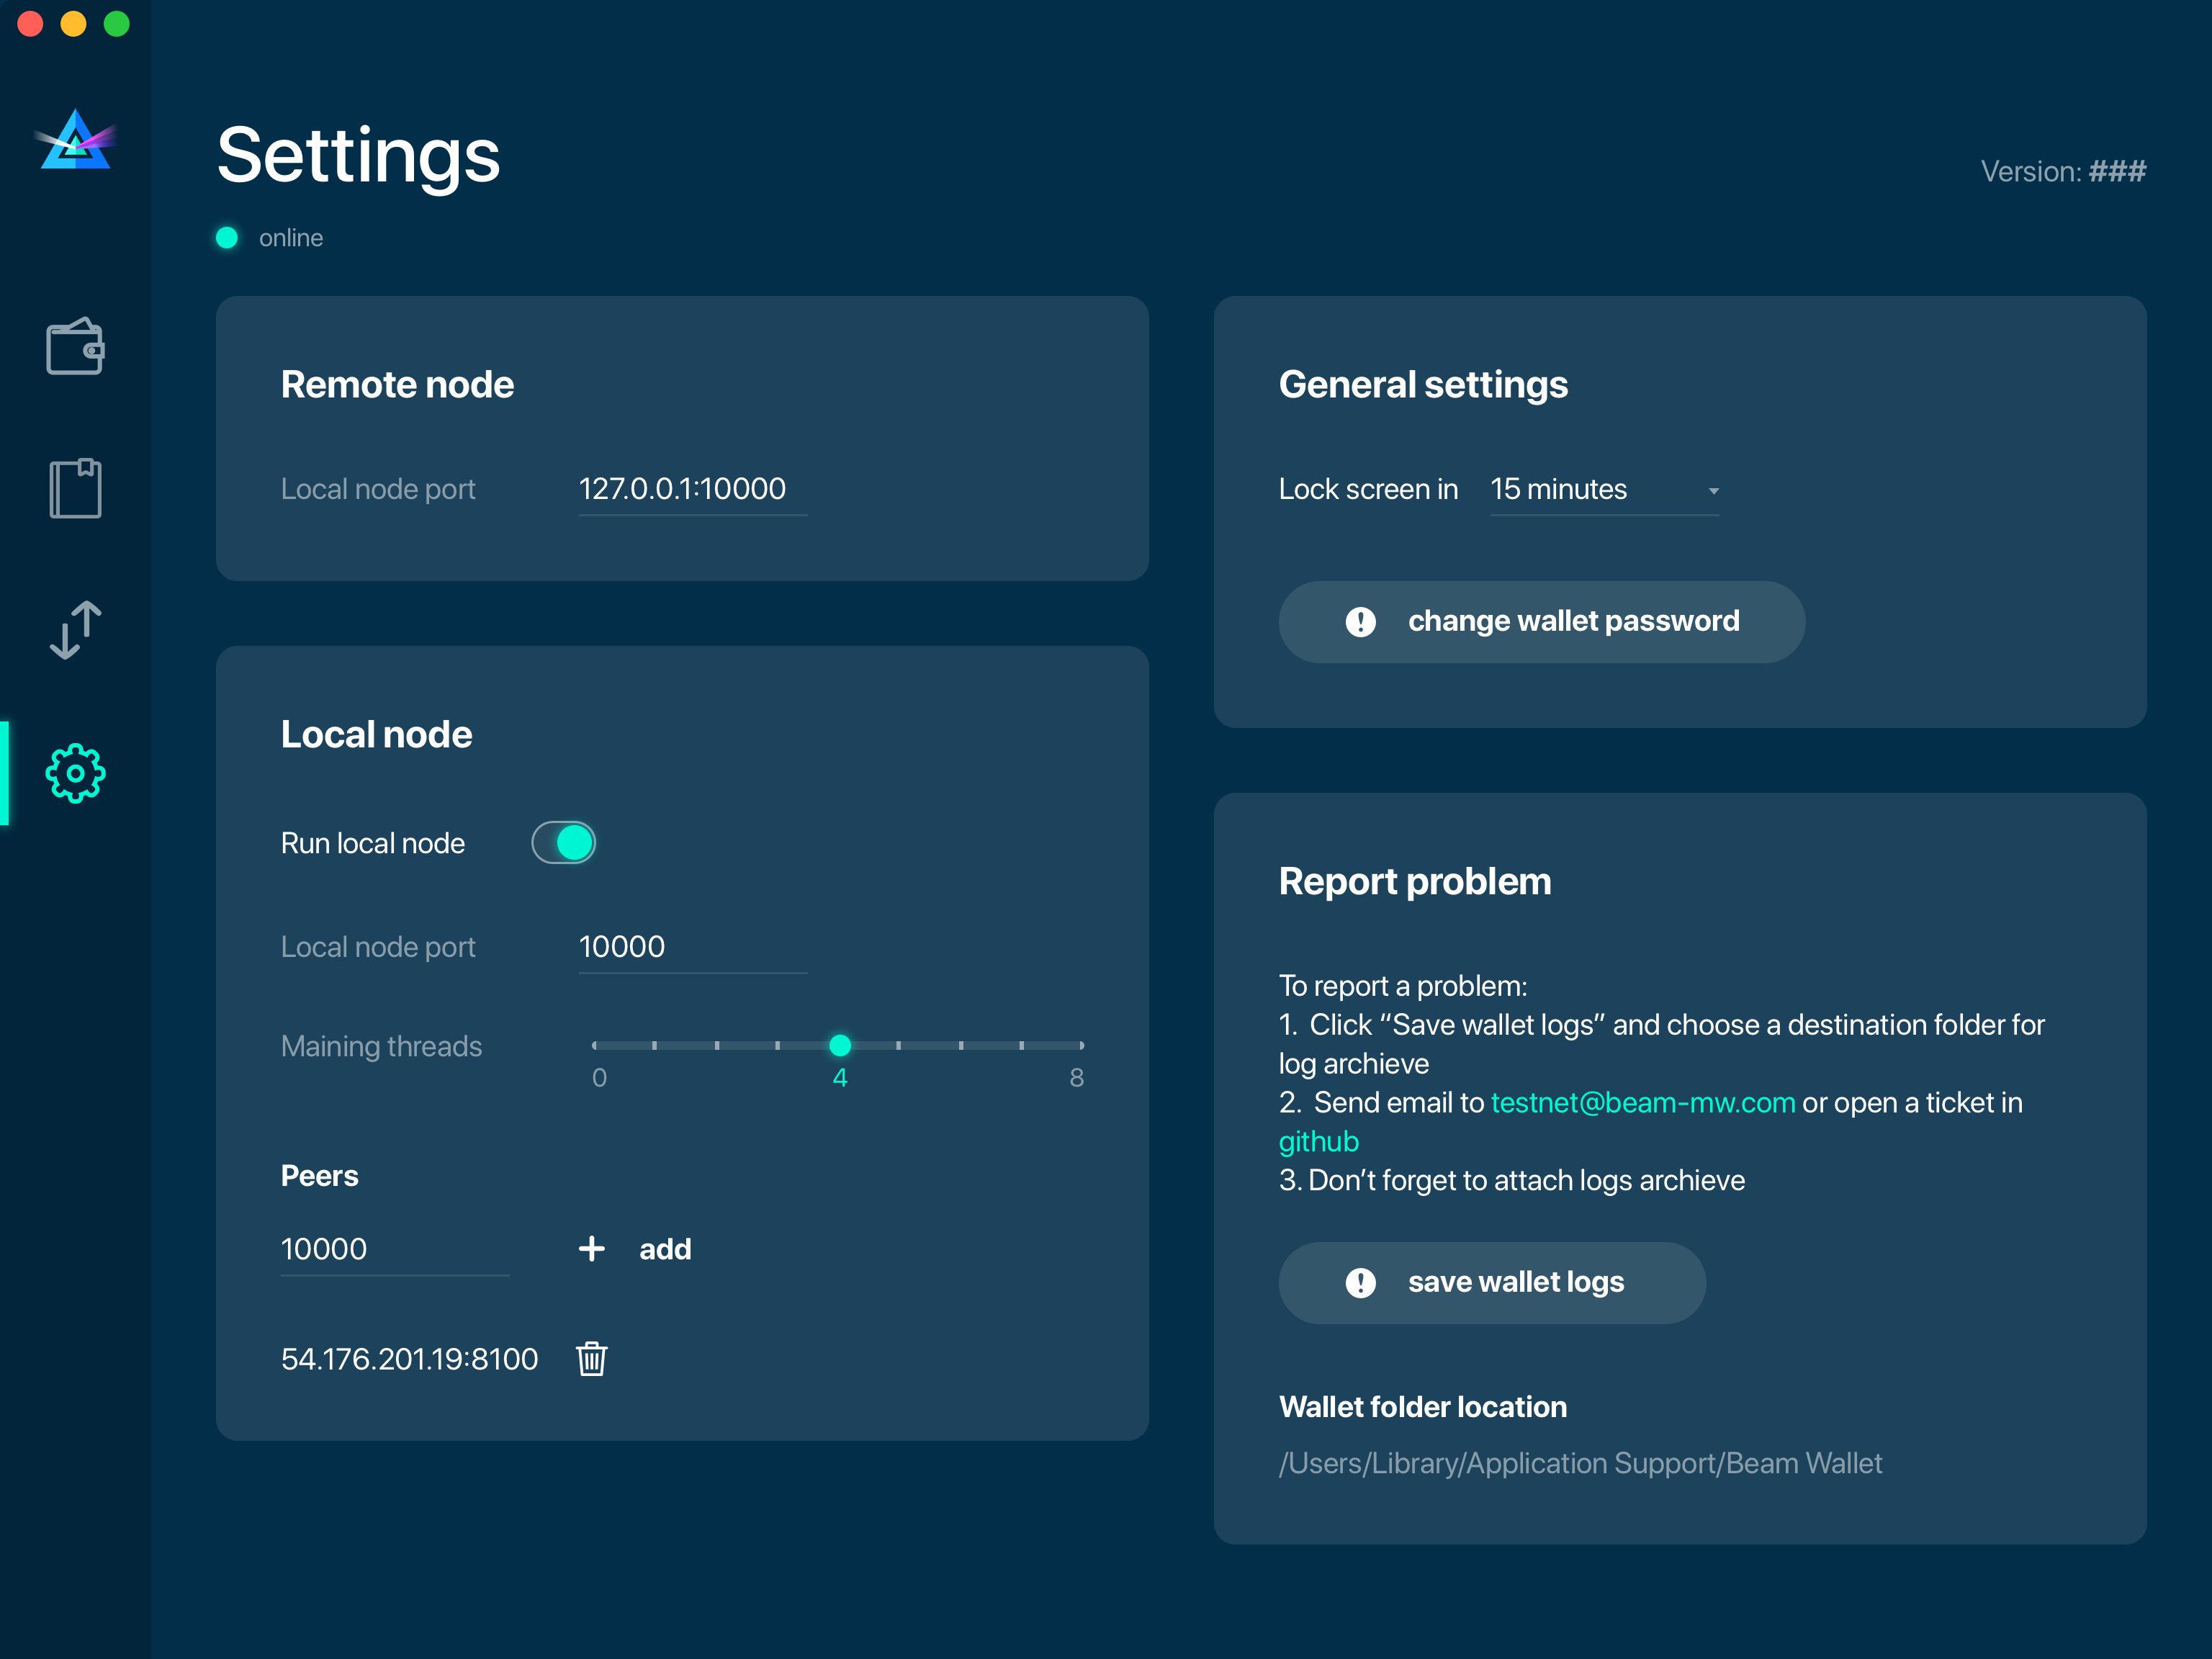
Settings screen
Note
At the top right corner of the screen the version is displayed. It is always important to specify the version when asking for support or reporting issues.
For integrated and external nodes settings see Choosing the node connectivity mode. When running integrated node you should specify the port on which the node will be listening on and the list of node peers.
The ‘General settings’ section allows you to change your wallet password and lock screen time. The Wallet will automatically lock to protect the funds from accidental unauthorized access to an active wallet in the set time you choose.
The ‘Report problem’ section allows you to create an archive of wallet logs and explains how to report an issue. It also shows the current location of the wallet files. See more details about reporting issues and getting support in the Reporting Issues and Getting Support and Desktop Wallet Troubleshooting sections.
OWallet troubleshooting
Where are the wallet keystore file located?
When OWallet app is installed, the wallet data files are stored separately from the binaries. The locations of all the files are described here: Files and Locations
Why is my transaction ‘In Progress’ for so long?
Both Sender and Receiver Wallets need to be online to complete a transaction. All active addresses expires after 24 hours since creation (unless specified otherwise). If Sender / Receiver does not come online within that time the transaction will be cancelled automatically.
I’m sending only some of my funds to a friend. Why my available balance became less than expected?
UTXO can be locked during active outgoing transaction. The locked amount is displayed as a change in ‘Sending screen’. The change will become spendable when the transaction expires or completes.
I’ve send my address to someone but the transaction is stuck ‘In Progress’
The most common reasons are listed here: * Addresses expire in 24 hours by default. Check to see if it’s expired in the ‘Expired addresses’ section on the Address screen. * Address might be misspelled. Check to see if the address is complete, is it missing any letters or number.
I’ve forgot the local password for my wallet
See Restoring funds
I’ve restored the wallet but I can’t see my transaction list and/or my active addresses
As explained in Restoring funds, only your available balance (ie. your UTXO) is kept on the blockchain, hence that’s all that can be restored.
I’ve restored the wallet but my balance is zero
Triple-check that all the words from the seed phrase are typed in correctly. One or more the of the words is wrong or mispelled. You will need to remove the wallet.db file and to repeat the restore procedure.
I’ve restored the wallet using my seed phrase - can someone still send me money to the addresses created in the previous wallet?
When a wallet is restored, only the balance (UTXO) is restored. Addresses (active and expired), contacts, transaction history are stored only locally, hence they can’t be restored from the blockchain. Each wallet instance is aware only of the active and expired addresses it displays. Therefore, all transactions sent to the addresses no wallet is aware of anymore will fail by timeout and the funds will be automatically released in sender’s wallet.
I’ve forgot my password
If you lost your password and cannot get into your wallet, you will have to remove wallet.db file and to Restore funds using your seed phrase to create a new password.
Why is the seed phrase the only thing connecting me to my funds?
To ensure the utmost privacy, the only information we can use to link you to your wallet is your seed phrase. So, if you lose it we cannot recover it for you.
I’ve lost my seed phrase
By design, the only way to access your funds (UTXO) is to have the seed phrase. If you still have an access to your wallet, create another wallet with new seed phrase on another machine and transfer funds to there. Any solution that would allow to access your funds without the seed phrase would severely compromise the privacy of BEAM. Therefore, in case you don’t have any active access to your funds there is nothing to do (the funds will be stored in the blockchain forever and noone will be able to access or spend them).
I’ve copied my wallet.db file to the new machine and I’d like to run wallets on both new and old machines simultaneously
At the current implementation each wallet.db file should be managed by only a single wallet instance. Any case involving manual transfer of the wallet database is not supported.
My question is not answered here
See Reporting issues and getting support